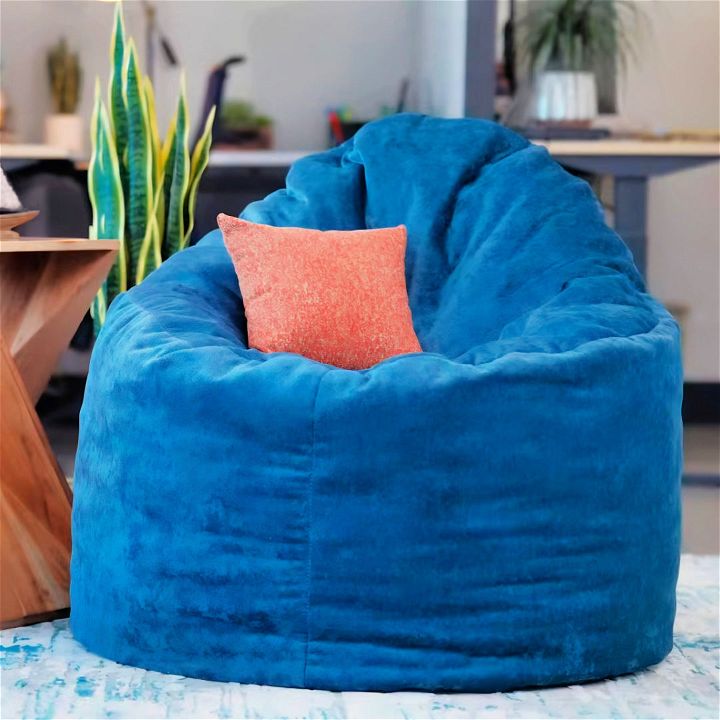
Making a stylish and comfortable bean bag chair doesn’t have to be costly or overly complicated. With the right materials and patience, you can craft a luxurious and durable DIY bean bag for your home, office, or any cozy nook that could use extra seating. This diy bean bag chair tutorial walks you through each step of making a bean bag chair, utilizing high-quality Crypton home fabric for durability, ease of maintenance, and comfort. Let’s dive into the process.

A Brief History
The concept of the bean bag chair was first introduced by Italian designers who wanted to create an innovative, comfortable, and stylish piece of furniture. The idea was to have a chair that could fit any body shape and size, providing a snug and cozy spot to sit.
Benefits of Bean bag Chairs
One of the main advantages of bean bag chairs is their ability to provide ergonomic support. They mold to the contours of your body, reducing the strain on your back and neck. This makes them ideal for long periods of sitting, whether you’re working, gaming, or just lounging.
Another benefit is their portability. Bean bags are lightweight and can be easily moved from room to room, making them perfect for small spaces or for those who like to rearrange their living areas frequently.
Types of Bean Bag Chairs
There are several types of bean bag chairs available, each offering different features:
- Standard bean bags are the most common and are great for casual seating.
- Gaming bean bags are designed with gamers in mind, providing extra support during long gaming sessions.
- Outdoor bean bags are made with weather-resistant materials, suitable for patios or gardens.
- Children’s bea nbags are smaller in size and often come in fun shapes and colors.
By understanding the history, benefits, and types of beanbag chairs, you can make an informed decision on which one would best suit your needs and lifestyle.
Materials Needed
- 6 Yards of Crypton Home Fabric: We used Piper Fabric in sapphire, but a wide variety of colors and textures are available.
- 3 Sheets of One Inch Firm Cushion Right Standard Foam (48″ x 80″): This will be cut up for the filling.
- Spray Adhesive & Quarter Inch Batting (at least 6 yards): For adhering the batting to the fabric.
Tools Required
- Sailrite Cordless Rotary Cutter: For accurate fabric cuts.
- Sailrite Blade Foam Saw (or equivalent): To cut the foam for filling.
- Acrylic ruler, Flexible Ruler, Marking Tool, Hand Sewing Needle.
- Ultrateed LS Sewing Machine: We used this with the Speed Reduction Upgrade Package for improved control.

Step-by-Step DIY Bean Bag Guide
Now learn how to make your own bean bag with our step-by-step DIY guide below:
1. Cutting The Fabric
First, spread out your fabric on a large, flat surface with the wrong side facing up. Create two circular pieces for the top and bottom of the bean bag. You do this by cutting a square slightly larger than the desired circle size, folding it twice, and cutting out the circle shape.
2. The Sides (Boxing)
Measure and cut out the rectangular piece that will serve as the side of the bean bag (also known as boxing). Fold this piece in half, right sides facing each other, and sketch out the curve at the top according to the provided dimensions. Cut along this curve.
3. Attaching Batting
Lay out your fabric pieces and apply a light coat of spray adhesive to the wrong side. Carefully place the batting on top and use the cordless rotary cutter to trim any excess batting.
4. Sewing The Pieces
Sew the side piece into a loop, ensuring a half-inch seam allowance. Then, attach this loop to the top and bottom circles, leaving about a 10-inch opening on one side for the filling.
5. Preparing The Foam Filling
Cut the foam sheets into one-inch squares. This may take some time, but it’s crucial for a comfortable filling that lasts longer than traditional beans.
6. Filling The Bean bag
With the foam ready, start filling your bean bag. The amount of foam needed can vary depending on your firmness preference.
7. Final Steps
Once filled to your liking, sew the opening closed. Hand sewing provides a more seamless finish, especially helpful if you’re using an invisible seam technique.
Video Tutorial
For a step-by-step video tutorial, watch our guide on YouTube.
It pairs well with this written guide, enriching the instructions with visual cues that can enhance your understanding and execution of each step.
Customization Ideas for Your DIY Bean Bag Chair
Making a DIY bean bag chair is not just about crafting a piece of furniture; it’s about expressing your personality and style. Here are some ideas to make your bean bag chair uniquely yours:
Choose Your Fabric
Selecting the right fabric can transform the look of your bean bag chair. Consider these options:
- Bold Prints: Make a statement with vibrant patterns that stand out.
- Themed Fabrics: Reflect your interests with themes like sports teams or movie characters.
- Mix and Match: Combine different fabrics for a creative patchwork effect.
Add Functional Features
Think about how you can make your bean bag chair more practical:
- Pockets: Sew on pockets to hold remotes, books, or gadgets.
- Handles: Attach handles for easy movement around your home.
- Zippers: Use zippers for removable covers that are easy to wash.
Personal Touches
Make your bean bag chair feel like it’s truly yours:
- Monograms: Add your initials or a special date with embroidery.
- Patches: Decorate with patches from places you’ve visited or events you’ve attended.
- DIY Art: Paint or stencil your own designs onto the fabric.
Maintenance and Care for Your DIY Bean Bag Chair
To keep your DIY bean bag chair looking great and feeling comfortable, follow these maintenance tips:
Cleaning
- Removable Covers: If your bean bag has a removable cover, wash it according to the fabric’s care instructions.
- Spot Cleaning: For non-removable covers, spot clean stains using a mild detergent and a damp cloth.
Keeping It Fluffy
- Regular Fluffing: Fluff your bean bag chair regularly to maintain its shape and comfort.
- Rotation: Rotate the chair to ensure even wear and tear.
Longevity
- Avoid Sunlight: Keep your bean bag out of direct sunlight to prevent the fabric from fading.
- Sharp Objects: Be cautious of sharp objects that could puncture the fabric.
By incorporating these customization ideas and maintenance tips, you’ll not only extend the life of your DIY bean bag chair but also enjoy a piece that reflects your personal style and meets your needs.

With diligence and care, you can make a bean bag chair that’s not just a piece of furniture but a statement of comfort and style. Enjoy your crafting journey!
