Making a DIY camera stabilizer might seem tricky at first, but it doesn’t have to be! With a bit of guidance, anyone can make their own stabilizer to improve their video quality. Our guide is here to help you through three different methods, complete with video tutorials. This is perfect for those who love doing things themselves and want to enhance their filming without spending a lot of money.
We start with a basic DIY camera stabilizer guide, showing you the essentials. Then, we’ll dive into making an inexpensive camera stabilizer grip that won’t break the bank. And for those who love a good project, we’ll show you how to make a DIY gimbal in just two hours.
Each tutorial is designed to be straightforward and useful, ensuring you get the best results. Ready to get your video to look smoother and more professional? Let’s get into it.
1. DIY Camera Stabilizer Guide
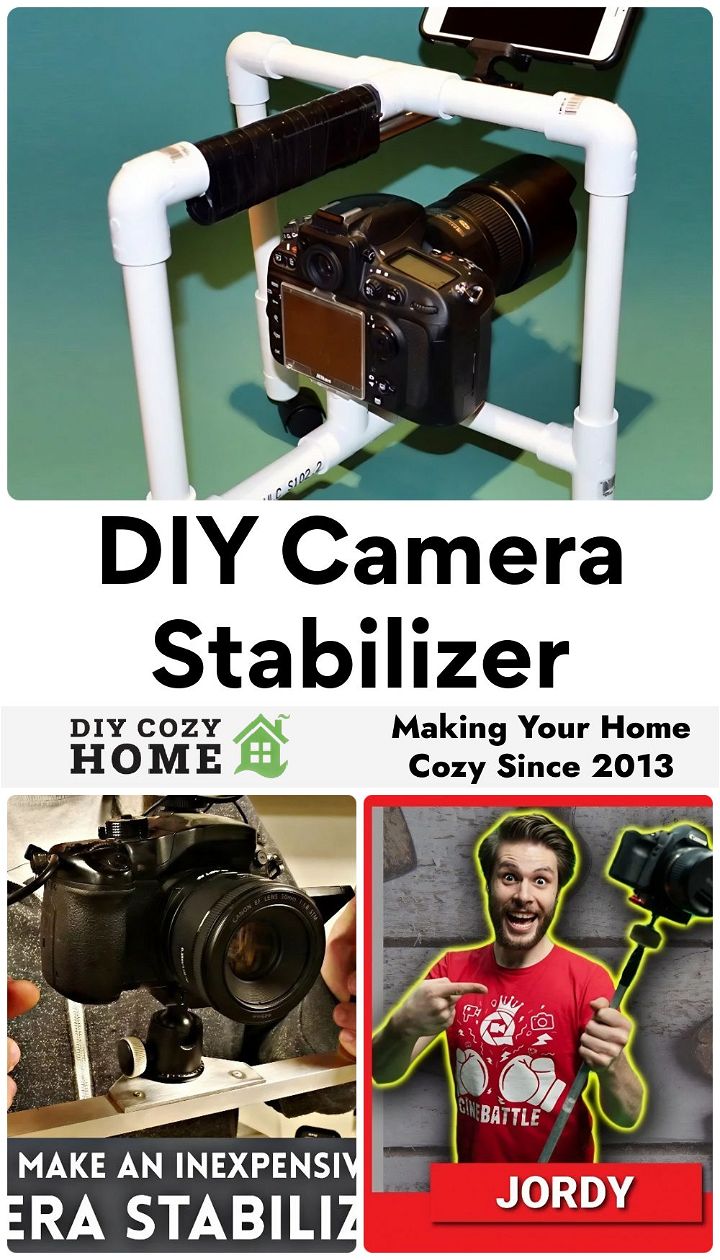
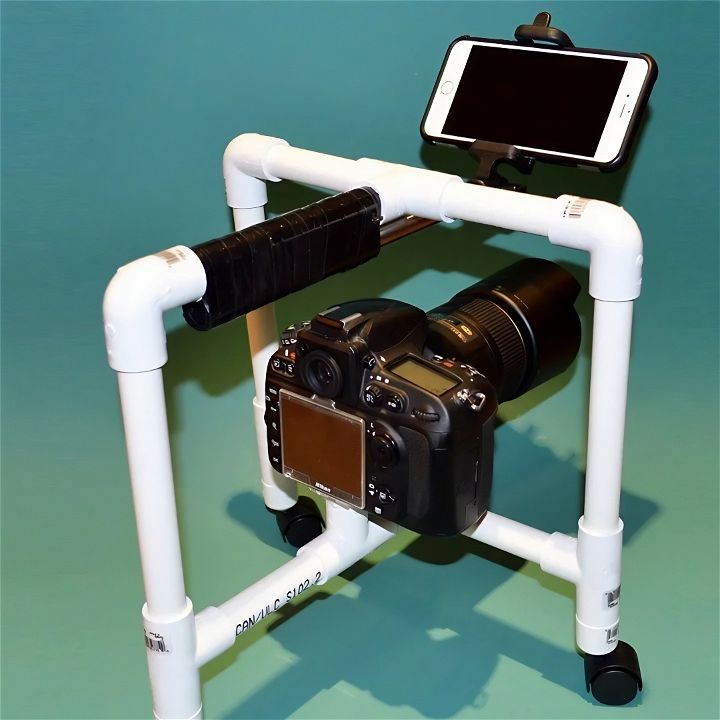
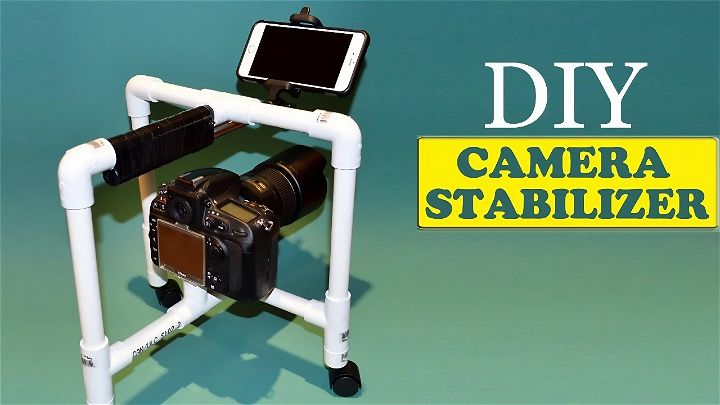
Making a camera stabilizer can vastly improve the quality of your photos and videos by minimizing the shakiness that often comes with handheld shooting. Below, you’ll find a straightforward, step-by-step guide to building your own camera stabilizer using simple materials. This guide is designed to be easy to follow, avoiding jargon and ensuring clarity at each step.
What You’ll Need
- PVC tubes: Five 4-inch, four 7-inch, and one 1-inch pieces.
- Three 90-degree elbows.
- Three T-joints.
- Three tube caps.
- One PVC plug.
- A * ¼ size screw, about 2.5 inches long, plus a compatible nut.
Step 1: Preparing the Base
- Begin with the cap that will be used as the base for attaching the camera. Drill a hole in this cap.
- Pick up a T-joint and drill a similar hole in it.
- Connect the cap and the T-joint by aligning their holes. Insert the * ¼ size screw through these holes.
- Secure the setup by tightening the nut onto the screw. This forms the secure base onto which the camera will be mounted.
Step 2: Assembling the Frame
- Take two T-joints and connect them with a 4-inch PVC tube.
- Attach a 1-inch PVC tube to one end of this setup.
- Connect another 4-inch tube to the opposite side, creating a U-shape.
- Attach this to the camera’s base by linking it with the 7-inch PVC sections and the 90-degree elbows, ensuring a rectangular frame forms.
- Finish the frame by connecting all loose ends with the appropriate PVC pieces, completing the stabilizer’s structure.
Step 3: Enhancing Stability and Maneuverability
- Add tube caps to the ends of each open tube to enhance the frame’s stability.
- For added maneuverability, you can opt to install casters within the caps by drilling a hole in the PVC cap and securing a caster in place. This allows for smoother movement and stability during use.
Optional: Adding a Selfie Stick
- For those who wish to use their stabilizer with a smartphone, consider integrating a selfie stick.
- Remove a section of the frame where you wish to attach the selfie stick.
- Insert the selfie stick into the vacant spot, securing it firmly.
Final Touches
Once your camera stabilizer is fully assembled, ensure its longevity and durability by reinforcing all connections with PVC cement. For aesthetic purposes, you may also want to coat the structure with electrical tape or spray paint it in your color of choice.
Video Tutorial
For a step-by-step video tutorial on crafting your DIY camera stabilizer, watch this YouTube video.
It pairs well with this written guide, enhancing understanding with visual aids to demonstrate the assembly process.
This tutorial is your companion in achieving smoother, more professional-looking photos and videos with a homemade touch.
2. How to Make an Inexpensive Camera Stabilizer Grip
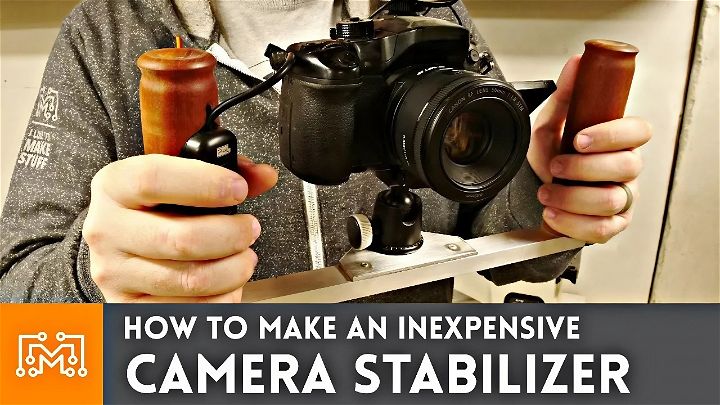
Are you tired of shaky footage ruining your videos? A stabilizer grip can make a world of difference, ensuring smoother, more professional results. But commercial stabilizers can be pricey. In this guide, based on proven methods from “I Like To Make Stuff,” you’re going to learn how to build your own stabilizer grip without breaking the bank.
This dslr stabilizer solution comes from firsthand experience, solving the common problem of camera wobble with an easy-to-make, customized grip. Whether you’re an aspiring filmmaker or a seasoned content creator, this DIY camera stabilizer guide offers valuable insights into creating a cost-effective tool that enhances your video quality.
What Will I Get Out of This?
By following this guide, you will learn how to:
- Create a two-handed camera stabilizer grip from affordable materials.
- Customize the grip for comfort and efficiency.
- Improve the quality of your handheld camera work by reducing shakiness.
Materials Needed:
- Aluminum channel (length to accommodate your camera and hands)
- Wood block for handles (any kind, though mahogany was used in this case)
- Quarter-twenty bolts and nuts
- Drill with bits suitable for metal and wood
- Pop rivets and rivet gun
- Saw (table saw, miter saw, or bandsaw)
- Lathe (optional, for shaping handles)
- Sandpaper
- Spray polyurethane (for finishing the handles)
- A basic camera remote (optional, for start/stop functionality)
Step-by-Step Instructions:
1. Preparing the Aluminum Channel
Measure and cut the aluminum channel to the required length to fit your camera and both hands. Use woodworking tools that are capable of cutting metal, ensuring a clean cut.
2. Creating the Handles
Take the block of wood and cut it into two pieces that will become the handles. Utilize a lathe to shape them into comfortable cylinders, or simply shape them with saws and sand them smooth. Finish the handles with spray polyurethane for durability and a good grip.
3. Attaching the Handles
Drill holes in the ends of the aluminum channel to attach the handles. Use quarter-twenty bolts to securely fix the handles in place, ensuring they are tight and sturdy.
4. Adding the Camera Mount
Drill a center hole in the aluminum channel to attach your camera mount. This can be a simple screw that fits your camera’s tripod socket or a more complex mount, depending on your needs and the materials available.
5. Optional Modifications
For added functionality, consider integrating a basic camera remote into one of the handles. This allows you to start and stop recording without needing to touch the camera, resulting in fewer disturbances and smoother footage.
Troubleshooting and Tips:
- If the grip feels too lightweight, causing imbalance, add counterweights at the bottom of the aluminum channel.
- Ensure all attachments and modifications do not obstruct the camera’s operations or essential buttons.
- Regular maintenance, such as tightening screws and bolts, ensures the stabilizer remains secure and effective.
Expand the Scope
Explore variations such as adding attachments for lights, microphones, or even creating a dual-purpose stabilizer that can mount both a camera and a smartphone. The modular nature of this design encourages experimentation and customization to suit your specific filming needs.
Why This Works
The broader grip distribution stabilizes your hands, significantly reducing the shakiness associated with narrower, single-handed grips. The chosen materials are both strong and lightweight, making the stabilizer durable and easy to handle for extended periods.
Video Tutorial
Want a visual demonstration? Watch a step-by-step video tutorial on YouTube for How to Make an Inexpensive Camera Stabilizer Grip. It provides a clear and easy-to-understand visual walkthrough of the techniques, making it a great companion to this written guide.
Building your own camera stabilizer grip not only saves money but also allows for customization that suits your specific shooting style and needs. With some basic materials and a bit of creativity, you can significantly improve your video quality, making your content more engaging and professional.
3. Making a DIY Gimbal in 2 Hours
Creating a do-it-yourself (DIY) gimbal doesn’t have to break the bank or consume your entire weekend. Whether you’re a budding filmmaker, a hobbyist looking to stabilize your shots, or just intrigued by the concept of crafting your own equipment, this guide help you build a functional DIY gimbal in under 2 hours.
Drawing on personal insights from creators who’ve undertaken similar challenges, this article aims to make the process as straightforward and accessible as possible, sprinkled with unique tips and troubleshooting advice learned through firsthand experience.

What Will I Get Out of This?
By following this guide, you’ll learn how to construct a basic but effective gimbal that can significantly improve the stability of your camera shots, all within a tight timeframe and budget. The DIY approach not only saves money but also deepens your understanding of how gimbals work, empowering you with the knowledge and confidence to tackle more complex builds or repairs in the future.
Step 1: Gather Your Materials
- Camera Mount/Quick Release Plate: This will serve as the attachment point for your camera. Look for an inexpensive option online or repurpose one from old equipment.
- Handle (with bearings if possible): This is what you’ll hold when using the gimbal. Incorporating bearings will improve the smoothness of your movements.
- Weights: These will act as counterbalances to stabilize your camera. Fishing weights or washers from a hardware store can work well.
- Pipes or Rods: Used for the frame of your gimbal. Aluminum rods are light and strong.
- Various nuts, bolts, and clamps for assembly.
Why Each Material is Needed
- The quick release plate allows for quick attachment/detachment of your camera.
- A handle with bearings enhances movement fluidity, crucial for smoother shots.
- Weights ensure the camera stays balanced and stabilizes your footage.
- Pipes or rods form the skeleton of your gimbal; their lightweight nature keeps the overall setup easy to manage.
Step 2: Assembling the Frame
- Measure and cut your pipes or rods according to the size you need. A simple design involves a vertical rod for attaching the weights at the bottom and the camera mount at the top.
- Securely attach the handle to the middle of the vertical rod. If your handle has bearings, ensure they are freely moving.
Step 3: Attaching the Camera Mount
- Attach the quick release plate to the top of your vertical rod. Ensure it’s securely fastened and level.
- Adjust the position so when the camera is mounted, its weight is evenly distributed over the gimbal.
Step 4: Adding the Counterweights
- Attach weights to the bottom end of the gimbal. Start with less weight, gradually adding more until you find the perfect balance that compensates for your camera’s weight.
Step 5: Fine-Tuning and Balancing
- With the camera attached, hold the gimbal by the handle. It should remain horizontal if balanced correctly.
- Adjust the placement of weights and the position of the camera mount as needed to achieve perfect balance.
Common Pitfalls and Troubleshooting
- Gimbal tilts to one side: This usually means the counterweights aren’t balanced properly. Adjust their position or add/remove weight as necessary.
- Shaky footage: Can be caused by loose components or not holding the handle correctly. Ensure all parts are tightened and practice moving with the gimbal smoothly.
Expanding the Scope
Once you’ve mastered this basic gimbal, consider experimenting with different designs or adding features like a dual-handle setup for even smoother shots. The beauty of DIY is the ability to customize your gear to suit your specific needs.
Video Tutorial
For a visual demonstration and additional tips, watch the step-by-step video tutorial on YouTube for “Making a DIY Gimbal in 2 Hours!”:
This guide aims to equip you with the knowledge to build a simple yet effective gimbal, enhancing your filmmaking capabilities without straining your budget. Remember, the key to improvement is practice and experimentation. Happy building and filming!
Conclusion
In conclusion, we’ve explored three accessible and practical ways to create a DIY camera stabilizer. From building a basic stabilizer guide to crafting an inexpensive stabilizer grip and finally piecing together a DIY gimbal within two hours, these methods promise to enhance your video quality on a budget.
Remember, great videos don’t always require expensive equipment; sometimes, the best tools are the ones you make yourself. With these video tutorials, you’re now equipped to stabilize your footage like a pro, making your filming smoother and more professional. Thanks for joining us on this creative journey to improve your video making skills.
Share on Pinterest
Save your money and shave your budget with these DIY camera stabilizer ideas! Pin it on Pinterest for easy access to video tutorials.
