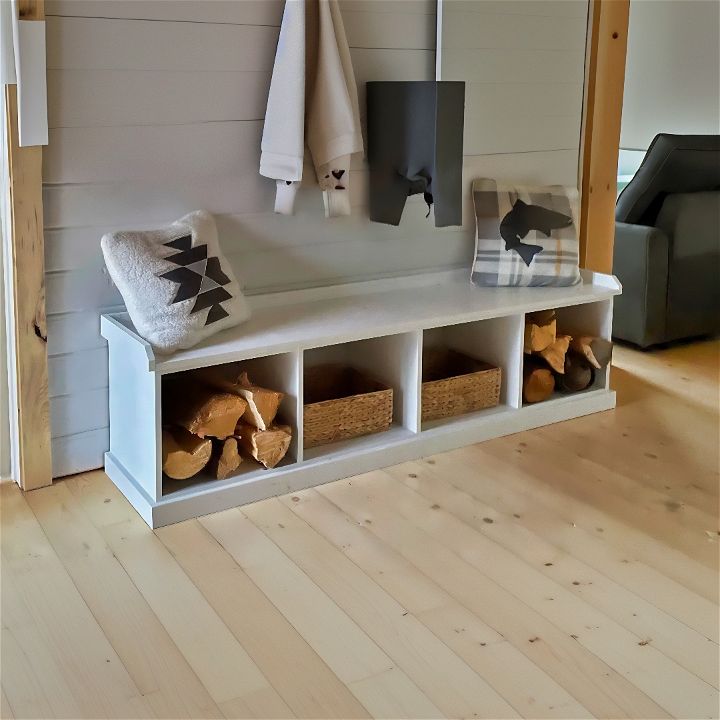
Building a DIY entryway bench can transform a cluttered entrance into an organized, welcoming space. Whether you’re a seasoned woodworker or a DIY beginner, this guide, coupled with Ana White’s tutorial, will walk you through making a customizable and functional DIY entryway bench that adds both storage and style to your home.
Introduction to DIY Entryway Bench
An entryway bench is more than just a place to sit; it’s a welcoming gesture that combines functionality with personal style. Whether you have a spacious foyer or a cozy nook, a DIY bench can transform your entryway into an organized and inviting space.
Why Build Your Own Bench?
Building your own entryway bench allows you to tailor it to your specific needs and decor preferences. It’s a rewarding project that not only enhances your home’s entrance but also reflects your craftsmanship and creativity.
The Basics of a Good Entryway Bench
A well-designed entryway bench should be sturdy, comfortable, and proportionate to the space. It should offer storage solutions for shoes, coats, and other outdoor essentials, keeping your entryway clutter-free.
Choosing the Right Design
When selecting a design for your DIY bench, consider the following:
- Size: Measure your entryway to ensure the bench fits comfortably without obstructing pathways.
- Storage: Decide on the type of storage you need. Drawers, shelves, and hooks are popular options.
- Style: Match the bench to your home’s aesthetic. Whether it’s modern, rustic, or minimalist, your bench can be a statement piece that complements your decor.
Planning Your Project
Planning is crucial for a successful DIY project. Here’s how to start:
- Sketch Your Ideas: Visualize your bench with simple drawings or digital design tools.
- List Materials and Tools: Determine what you’ll need and check if you have the necessary tools.
- Set a Budget: Estimate the cost of materials and set a budget to keep your project affordable.
Inspiration for Your Bench
Looking for inspiration? Here are some creative ideas:
- Bookshelf Bench: Convert a bookshelf into a bench with storage bins for a multifunctional piece.
- Repurposed Headboard: Transform an old headboard into a charming bench with character.
- Dresser Turned Bench: Upcycle a dresser into a sleek bench with drawers for ample storage.
A DIY entryway bench is a practical addition to your home that can be both a functional storage solution and a charming first impression for guests. Let’s make a entryway bench today by following our instructions below:
What You’ll Need
Before you start, make sure you have all the necessary tools and materials. For this project, you will need:
- A saw for cutting wood (hand saw, circular saw, or miter saw)
- Drill
- Pocket hole jig (optional but recommended for a cleaner look)
- Brad nailer
- Wood glue
- 1×3 lumber for the base supports and trim
- Sanded plywood for the bench structure
- Wood filler
- Sandpaper (120 grit)
- Primer and paint or stain
- Measuring tape
- Safety equipment (gloves, glasses)
Step-by-Step Guide to Building Your Entryway Bench
Learn how to build your entryway bench step-by-step with our comprehensive guide below:
1. Plan Your Bench
Measure the space where you want to place your bench to determine its size. Ana White’s design is versatile, allowing for customization in both length and the number of storage compartments. Decide on the bench dimensions and then proceed to cut your wood according to these measurements.
2. Assemble the Base Frame
Start by attaching the bottom shelf to the two side panels using wood glue and brad nails. This base frame provides a foundation to which you will add dividers for designated storage sections.
3. Install Dividers
Place the dividers evenly along the length of the bench, using the pre-cut base supports as a guide. Secure these dividers from the bottom with brad nails and wood glue. These dividers not only add structural integrity but also help organize the storage space.
4. Add Base Supports
Strengthen your bench by adding base supports along the bottom. These can be attached using pocket holes or brad nails. Remember to use wood glue for extra durability. These supports will ensure the dividers stay in place and the top doesn’t sag over time.
5. Incorporate Additional Support
For longer benches, it’s a good idea to add a center leg for added support to prevent sagging. Measure the distance from the bottom shelf to the ground in the center of the bench and cut a piece of wood to this length. Insert this as a central leg and secure it in place.
6. Trim and Finish
Once the structure is built, start trimming the bench. Measure and cut the trim pieces as you go for an accurate fit. Attach the trim to the sides and front of the bench using brad nails and wood glue. Fill any gaps or nail holes with wood filler for a seamless look.
7. Sand, Prime, and Paint
Sand the entire bench with 120 grit sandpaper to prepare it for finishing. Remove all sanding residue before applying a coat of primer. Once the primer is dry, paint or stain your bench in the color of your choice.
8. Attach the Bench Top
The final step is to secure the top piece of your bench. If you’ve used pocket holes on the base supports, attach the top by driving screws upwards through these holes. This method keeps the screws hidden and provides a clean finish.
Video Tutorial
For a step-by-step video tutorial on how to build this entryway storage bench, check out Ana White’s guide.
It pairs well with this written guide, providing a visual component to complement the techniques described above, making it easier to understand and follow along.
Customization Tips for Your DIY Entryway Bench
Here are some tips to help you customize your DIY entryway bench:
Selecting the Right Materials
Choose materials that are durable and match your home’s aesthetic. For a rustic look, reclaimed wood can add character. For modern homes, consider sleek finishes like painted MDF or laminated plywood.
Adding Personal Touches
Personalize your bench with details that reflect your style. Consider adding cushioning for comfort, using fabric that complements your interior. Add decorative trim or moldings for a more refined look.
Functional Customizations
Think about the functionality of your bench. If storage is a priority, design the bench with cubbies or add baskets underneath for shoes and accessories. Hooks or shelves above the bench can hold coats and hats.
Safety and Maintenance
Safety is paramount when building your DIY bench. Always use the right tools for the job and follow safety guidelines. If you’re not experienced with power tools, seek help or opt for hand tools that are safer to use.
Maintaining your bench is essential for longevity. Use protective finishes like polyurethane to guard against wear and tear. Regularly check for loose screws or wobbly parts and tighten them as needed. Clean the bench with appropriate cleaners for the material you’ve chosen to keep it looking fresh.
Conclusion
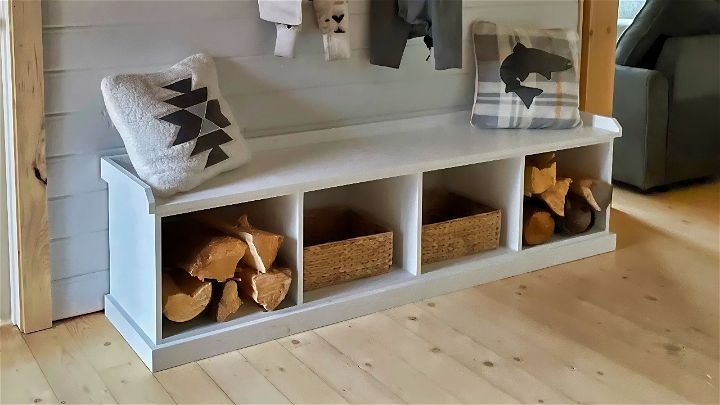
By following these instructions, you’ll be able to make a practical and stylish DIY entryway bench that improves the functionality of your home. Whether you’re storing shoes, outdoor gear, or simply using it as a place to sit and put on your shoes, this bench is a great addition to any entryway.
FAQs on DIY Entryway Bench Build with Free Plans
Making an entryway bench can enhance the functionality and aesthetics of your home. We’ve compiled a list of frequently asked questions (FAQs) based on the comments of those who have watched our tutorial video. Here, we aim to provide you with clear answers to help you with your project.
What makes this mudroom bench design different?
This bench design is prized for its simplicity and functionality. It is designed to be built without the need for extensive renovations, making it perfect for homes where space is limited or where permanent modifications are not desired.
How much did the bench cost to make, considering the price of lumber?
The cost of building the bench can vary significantly based on your region and the current price of lumber. We recommend checking local hardware stores or lumber yards for the most accurate and up-to-date pricing.
What kind of wood was used for the larger panel pieces of the bench?
In our tutorial, we typically use plywood for the larger panel pieces due to its durability, ease of use, and cost-effectiveness. However, the specific type of plywood can vary based on availability and your budget.
Are there any particular tools needed for this project?
Basic woodworking tools are required, which include a drill, saw, pocket hole jig, and screwdriver. For more detailed work, additional tools might be necessary depending on the complexity of your design.
Can you make drawers with the Shelf Help system mentioned in the video?
Yes, the Shelf Help system can be used to plan and execute various projects including drawers. It’s designed to make customizing your project simpler, even for beginners.
Why didn’t the tutorial show the use of glue?
In some projects, screws or nails might provide sufficient strength on their own, making glue optional. However, using wood glue can offer additional stability and is recommended for a more durable construction.
What software is used for sketching the bench design?
Multiple software options are available for designing woodworking projects, with SketchUp being a popular choice for its user-friendly interface and robust features. While the video doesn’t specify the software used, SketchUp is a reliable starting point for beginners and professionals alike.
What does 1×3 @ 8′ represent regarding the materials needed?
This notation represents the size and length of the lumber needed. “1×3” indicates the thickness and width of the board in inches, while “8′” specifies the length of the board in feet.
Is the Shelf Help app and website still available?
There may have been updates or changes since the video was made. If you’re having difficulty finding the Shelf Help app or website, it’s a good idea to check the tutorial’s video description for the most current links or search for alternative resources online.
What size screws were used for the bench in the video?
For projects like the one featured in the video, 1 ¼ inch to 1 ½ inch pocket hole screws are generally recommended. The exact size may vary based on the specific requirements of your project, such as the thickness of your materials.
We hope these FAQs have been helpful for your entryway bench project. Remember, every project is an opportunity to learn and improve your skills. Happy building!

