When it comes to upgrading your garage floor, epoxy coating is a top choice for many homeowners. But what exactly is epoxy, and why is it so beneficial for garage floors? Let’s break it down in simple terms.
What is Epoxy?
Epoxy is a type of resin that, when mixed with a hardener, creates a strong, durable surface. It’s known for its resilience and ability to withstand a lot of wear and tear, which is perfect for a space like a garage that sees a lot of action. Whether you’re parking cars, storing tools, or using the space for DIY projects, an epoxy floor can handle it all.
Advantages of Epoxy Flooring
One of the biggest advantages of epoxy is its toughness. It’s resistant to impacts, scratches, and even some chemical spills, which means it can last for years without showing signs of damage. This makes it a practical choice if you want a floor that’s not only tough but also low maintenance.
But epoxy isn’t just about durability. It also offers a lot of flexibility in terms of design. You can choose from a variety of colors and patterns to match your style or even add decorative chips for a unique look. This means you can have a floor that’s not only strong but also stylish.
Another plus is that epoxy is relatively easy to clean. Spills can be wiped up quickly, and the surface resists stains, so it keeps looking good with minimal effort. And because it creates a seamless surface, there are no cracks or crevices where dirt and dust can accumulate.
Now, learn how to epoxy your garage floor using two different methods, and follow the step-by-step instructions provided below:
DIY Epoxy Garage Floor
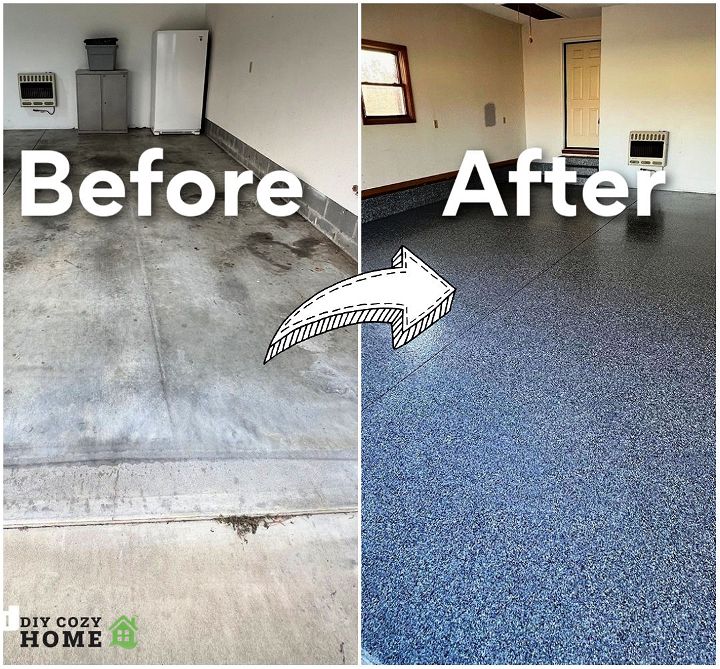
Transforming your garage floor with epoxy coating is a rewarding DIY project that not only enhances the visual appeal of your space but also provides a durable surface that withstands day-to-day use. Here’s a helpful and comprehensive guide to applying epoxy coating on your garage floor, ensuring your project goes smoothly from start to finish.
Preparation
Clean and Clear the Space
- Begin by removing all items from your garage. Ensure the space is completely clear before proceeding.
- If you have any old coatings, carpets, or adhesives on the floor, remove those as well.
Clean the Floor
- Thoroughly power wash the garage floor to remove dirt, oils, and other contaminants. Focus on getting rid of as much grime as possible.
- Target any tough stains with a concrete cleaner or stain remover, using a brush to work the solution into the surface.
- Apply a degreaser to ensure the floor is clean and free of oils.
Surface Preparation
- Etch the concrete to create a rough profile for better adhesion of the epoxy coating. Follow the instructions on the etching solution and rinse thoroughly after application.
- For flawless results, consider repeating the cleaning, degreasing, and etching process, ensuring a thoroughly prepped surface.
- Fill any cracks or holes with a concrete filler and sand smooth once dry.
Applying Epoxy Coating
Mixing the Epoxy
- Epoxy resin comes in two parts: the resin and the hardener. Make sure to mix these according to the manufacturer’s instructions. Incorrect proportions can lead to poor curing and finish.
- Once mixed, you have a limited working time to apply the epoxy, known as its “pot life.”
Application
- Start by cutting in around the edges of the garage with a brush to ensure neat borders.
- Use a roller to apply the epoxy in sections. It’s essential to work in manageable areas to maintain a wet edge.
- After applying epoxy to a section, immediately sprinkle color flakes as desired for a decorative finish. This step is optional.
- Continue this process, section by section, ensuring even coverage and distribution of color flakes.
Finishing Touches
- Once the entire floor is covered, allow sufficient time for the epoxy to cure. Refer to the manufacturer’s recommendations for drying times.
- For additional durability and a sleek finish, consider applying a clear epoxy or urethane topcoat. This step is highly recommended, especially for high-traffic areas.
Maintenance
- After the final coat has cured, avoid heavy traffic on the floor for at least 48-72 hours.
- Regularly clean the floor with mild detergents and avoid harsh chemicals to maintain the epoxy’s appearance.
Video Tutorial
For a visual aid and more detailed instructions, watch this step-by-step video tutorial on DIY Garage Floor Epoxy Coating here.
It pairs well with this written guide, offering a comprehensive view of the process in a clear, understandable manner. Seeing the techniques in action provides additional clarity and confidence as you tackle your own project.
Following these steps will help ensure a successful application of epoxy on your garage floor, providing a long-lasting, durable finish. This DIY project not only increases the functionality of your garage but also boosts its aesthetic appeal. Happy coating!
Don’t forget to save this DIY Epoxy Garage Floor project to your Pinterest boards!
How to Epoxy Garage Floor – Comprehensive Step-By-Step Guide
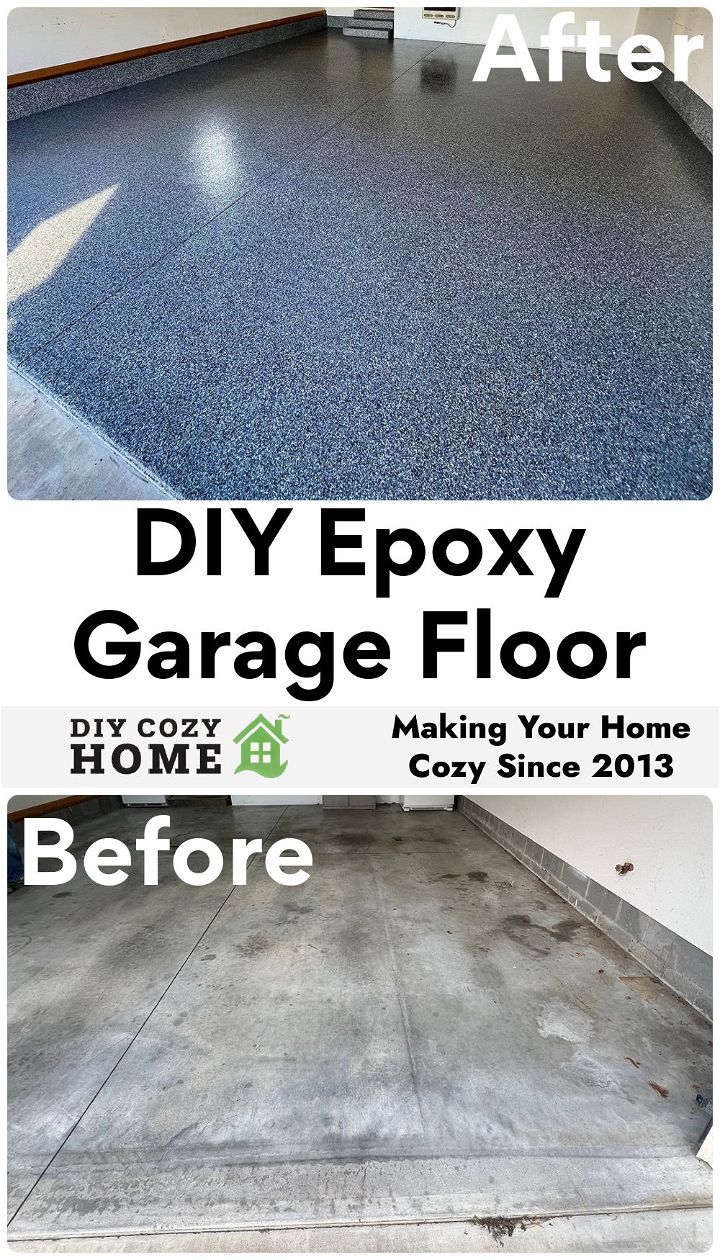
Adding an epoxy coat to your garage floor is a transformative endeavor, both aesthetically and functionally. Not only does it significantly elevate the appearance of your garage space, but it also adds a durable layer of protection against stains, chips, and abrasions. Learn the entire process of applying an epoxy coat to your garage floor, from preparation to the final touches. You will learn not just how to achieve a professional-looking finish but also understand the critical steps needed for ensuring the longevity of your flooring.
Preparation is Key
Before diving into the epoxy application, it’s crucial to understand that nearly 90% of the process involves preparation. The success of your epoxy coating hinges on the thoroughness of your prep work.
Cleaning and Moisture Testing
- Empty your garage, making sure no objects touch the floor.
- Remove any existing tape or glue residues.
- Sweep the area, then perform a moisture test using plastic sheeting taped to the floor. Leave it for 24 hours. If moisture is present, a moisture barrier is needed before applying epoxy.
Degreasing
- Apply a quality degreaser on the entire floor. Scrub thoroughly to remove any oil or grease.
Concrete Preparation: Grinding vs. Acid Etching
- Concrete Grinding: This method involves using a concrete grinder to remove the top layer of the concrete, revealing a fresh surface for better epoxy adhesion. This method is more labor-intensive but results in longer-lasting outcomes.
- Acid Etching: A less intensive method where a diluted acid solution is used to etch the surface of the concrete, providing a texture for the epoxy to grip.
Choose a method based on your garage floor’s condition and your ability to invest time and equipment.
Epoxy Mixing and Application
Necessary Materials
You’ll need the epoxy kit, anti-skid additive, decorative flakes, rollers, brushes, mixing sticks, and, optionally, spike sandals for walking on wet epoxy.
Mixing the Epoxy
- If handling multiple epoxy bags or differing colors, mix the parts A (clear) and B (colored) in separate containers to ensure uniform color.
- Combine the parts as directed, adding the anti-skid additive if not applying a clear topcoat.
Applying the Epoxy
- Start by brushing the edges of the floor.
- Use a roller to apply the epoxy in a W or M pattern, maintaining a wet edge.
- Disperse decorative flakes into the air as you go for a random distribution.
Drying and Curing
Allow the epoxy to dry completely, typically 24 hours, before removing any masking tape. Wait at least three days before moving vehicles back into the garage, ensuring full curing.
Tips and Tricks
- Weighted Grinding: Adding weight to the grinding machine can improve efficiency. Be cautious and follow equipment guidelines.
- Vertical Edges: Don’t forget to apply epoxy to the vertical edges where the floor meets the walls for a uniformly finished look.
- Chip Distribution: Achieve a natural look with chips by throwing them high into the air, letting them disperse randomly.
- Spike Sandals: Highly useful for moving across the wet epoxy without leaving marks. They allow for a seamless work process.
FAQs
- Can I apply epoxy over old paint? Remove old paint through grinding for best results. Epoxy needs a porous surface to adhere properly.
- How long does the epoxy floor last? With proper preparation and application, an epoxy floor can last decades under normal garage conditions.
- Is epoxy slippery when wet? Yes, it can be. The inclusion of an anti-skid additive is recommended, especially in climates prone to moisture.
- How do I clean the epoxy floor? Use a mild detergent and water. Avoid acidic cleaners that can damage the epoxy.
- Can I apply epoxy in cold weather? Temperatures should ideally be between 60* °F and 85°F for best results. Check product specifications for temperature ranges.
Video Tutorial
For a visual demonstration of the entire process, watch the Builds by Maz step-by-step video tutorial on YouTube. It offers clear insights into techniques for those who prefer following along visually.
By following this guide, you’ll not only protect and beautify your garage floor but also enhance its functionality. With the right preparation and application, your epoxy-coated garage floor will serve you well for years to come, proving to be a worthwhile investment in your home.
Frequently Asked Questions About Epoxy Garage Floors
When it comes to giving your garage floor a durable, attractive finish, applying an epoxy coating is a popular DIY project. However, it’s natural to have questions before you start. Here are some of the most common queries people have, answered in a simple and straightforward manner.
How long does it take to apply epoxy to a garage floor?
The process can vary, but generally, you’re looking at about 2-3 days from start to finish. This includes preparation, application, and drying time. However, you should avoid heavy traffic on the floor for at least 48-72 hours after the final coat.
Can I apply epoxy over an old painted garage floor?
Yes, but with a caveat. You’ll need to remove the old paint first, ideally by grinding. Epoxy requires a clean, porous surface to adhere properly, and existing paint can interfere with this bond.
Is it necessary to etch the concrete before applying epoxy?
Absolutely. Etching opens up the pores of the concrete, allowing the epoxy to bond securely. You can use a commercial etching product or a mixture of water and muriatic acid, depending on your preference and the condition of your floor.
Will epoxy make my garage floor slippery?
Epoxy floors can become slippery when wet, especially if you’ve added a glossy topcoat. To combat this, consider mixing in an anti-slip additive into your epoxy or topcoat. This provides extra traction and safety.
How do I clean my epoxy garage floor?
Cleaning is simple. Use a soft broom or dust mop for daily cleaning. For a deeper clean, a mild detergent and water will do the trick. Avoid harsh chemicals, as they can damage the epoxy.
What temperature is best for applying epoxy?
For the best results, apply epoxy when temperatures are between 60°F and 85°F (15°C to 30°C). Too hot or too cold can affect the curing process and the final finish.
Can I do the epoxy application myself?
Yes, many people successfully apply epoxy to their garage floors themselves. However, it requires careful preparation, following instructions closely, and working efficiently. If you’re unsure, watching a tutorial or consulting a professional might be helpful.
How long will my epoxy garage floor last?
With proper application and maintenance, an epoxy garage floor can last decades. Its lifespan can be extended through regular cleaning and avoiding harsh chemicals or heavy impacts.
What if there are cracks in my garage floor?
Small cracks should be filled with a concrete filler and sanded smooth before you start the epoxy process. Larger cracks may require more extensive repair. It’s essential to address these issues to ensure a smooth, durable finish.
Can epoxy be used outdoors?
Epoxy can be used on outdoor surfaces, but it may not be as durable as indoors due to exposure to sunlight, weather, and temperature fluctuations. For outdoor applications, look for epoxy products specifically designed for exterior use.
Understanding these aspects of applying an epoxy coating can make your DIY project more manageable and ensure a beautiful, long-lasting finish for your garage floor.
2024 Product Update: The Latest in DIY Epoxy
The world of DIY epoxy has seen some remarkable advancements in 2024, with new formulations and additives making the process easier and the results more durable than ever before. Let’s explore these innovations and how they can benefit your next project.
Fast-Curing Epoxy Formulations
Recent developments have introduced fast-curing epoxies that achieve full curing in just two hours, thanks to Vitrimer chemistry. This rapid turnaround is perfect for DIY enthusiasts who want to complete their projects quickly without sacrificing quality.
Eco-Friendly Options
Sustainability is a growing concern, and the latest epoxy vitrimers address this with re-processability and reusability. These new formulas allow for closed-loop circularity in plastics, making your DIY projects more environmentally friendly.
Enhanced Durability and Color Stability
Innovations in epoxy@ZnO coatings have led to significant improvements in hydrophobicity and color stability. This means your epoxy-coated surfaces will not only resist water better but also maintain their color integrity for longer periods.
Scratch Resistance
Advancements in nano-modifiers, like linear polyhedral oligomeric silsesquioxane (POSS), have been integrated into epoxy resins to enhance mechanical strength and scratch resistance. This is particularly beneficial for high-traffic areas where durability is key.
Future Directions
Looking ahead, the focus on eco-friendly and high-performance materials is likely to continue. We can expect further enhancements in the ease of use, durability, and sustainability of DIY epoxy products, making them an even more attractive option for home improvement enthusiasts.
These updates not only make DIY epoxy applications more user-friendly but also ensure that the results are long-lasting and environmentally responsible. Whether you’re a seasoned pro or just starting out, these new products are sure to make your next project a success.
Long-Term Maintenance and Care in 2024
Maintaining an epoxy garage floor in 2024 is straightforward, but it’s essential to be mindful of the wear-and-tear it may encounter. Here’s how you can keep your floor in top condition:
Regular Cleaning
Sweep or vacuum your floor regularly to remove dirt and debris. For a deeper clean, mop with a pH-neutral cleaner designed for epoxy surfaces. Avoid harsh chemicals, as they can dull the finish.
New Cleaning Products
The market now offers cleaning products specifically formulated for epoxy floors. These products cater to the unique needs of epoxy surfaces, ensuring they remain clean without damage.
Climate Considerations
Changes in climate, such as extreme temperatures or humidity, can impact the maintenance of your epoxy floor. In areas with high humidity, ensure proper ventilation to prevent moisture buildup. In regions with temperature extremes, use a UV-resistant topcoat to protect against sun damage.
Preventative Measures
Place mats at entrances to catch dirt and grit. Use furniture pads under heavy items to prevent scratches. If you notice any chips or cracks, repair them promptly to prevent further damage.
Dealing with Damage
For spills, act quickly to prevent staining. If damage occurs, use a repair kit suitable for epoxy floors. For more severe damage, you may need to consult a professional.
By following these tips, your epoxy garage floor will remain durable and attractive for years to come, withstanding the daily demands of garage life.
Conclusion
Wrapping up, mastering the art of epoxying your garage floor is a fantastic way to enhance its durability and appearance. By following the step-by-step instructions provided in this guide, you can easily transform your space into a sleek and polished area. With two different garage floor coating methods to choose from, you can select the one that best suits your needs and preferences. Happy epoxying!

