Finding the perfect spot to hang your keys so you never lose them again can be tricky. But why not make your own DIY key holder? By making one yourself, not only do you get to add a personal touch to your home, but you also get to have fun in the process. There are various ways to craft a key holder that matches your style, using simple tools and items that are easy to find.
In this guide, we’ll show you how to make a DIY key holder in three different ways. Whether you prefer something sleek like a magnetic key holder that’s state-shaped, want to use dollar tree items for a budget-friendly home decor project, or are looking for an easy key holder shelf, we’ve got you covered. So, let’s dive in and start making something useful and stylish for your home.
1. DIY Magnetic Key Holder (State Shaped)
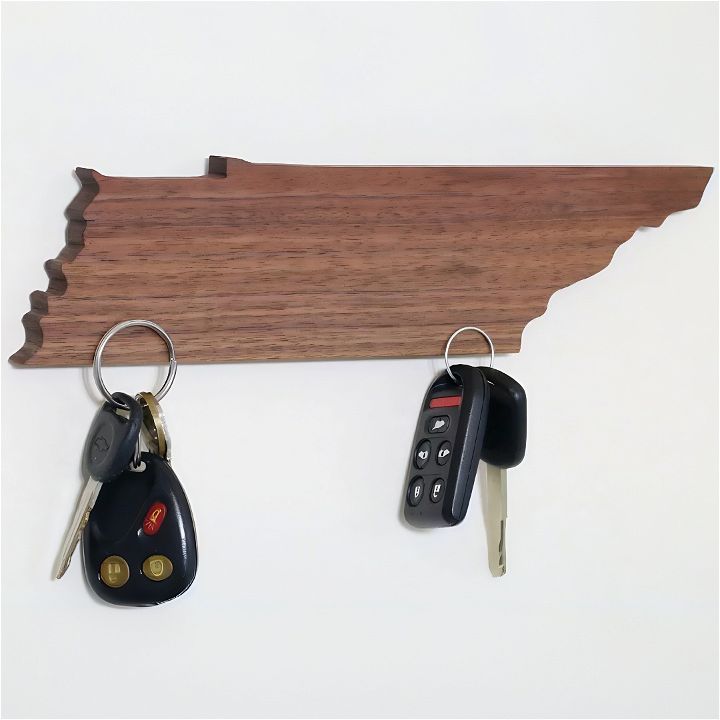
Making a state-shaped magnetic key holder is not just an opportunity to showcase your regional pride but also a fun, engaging DIY project. This easy-to-follow guide will lead you through each step, ensuring you can make a beautiful and practical key holder with ease.
Materials Needed:
- Wood (size depends on desired state shape; 1×4 Dimension board can simplify the process)
- 3 rare-earth magnets
- Spray adhesive
- Sandpaper (various grits)
- Boiled linseed oil (for finishing)
- Mounting hardware
- Tools: Jigsaw or band saw, drill press or hand drill, sander
Step-by-Step Instructions:
Preparing the Wood:
- Choose Your Wood Size: Begin with a piece of wood sized according to your state’s dimensions. If starting from rough lumber, plane and join to your desired thickness and smoothness. A simple alternative is using a 1×4 board.
- Print Your State Outline: Find an outline of your state online, print it out, and cut to rough shape. Adjust lines for easier cutting if necessary.
- Attach Template to Wood: Use spray adhesive to attach your state outline to the wood. Ensure only a light coat on the template for easy removal later.
Cutting the Shape:
- Cut the Outline: Using a jigsaw, band saw, or scroll saw, carefully follow the outline of your state. Prioritize smooth, cautious cuts to minimize sanding later.
- Remove the Template: Gently peel off the template. You should now have a recognizable state shape!
Sanding and Shaping:
- Sand the Edges: With either an oscillating sander or by hand, smooth out all edges of your state. Start with lower grit sandpaper and work up to 220 grit for a smooth finish.
Adding the Magnets:
- Mark Magnet Positions: Decide on the placement for your three magnets, typically spaced evenly along the bottom edge. Mark these spots clearly.
- Drill Holes for Magnets: Using a drill press or hand drill, drill holes for your magnets, ensuring not to pierce through the wood. A bit slightly larger than your magnet diameter works best.
- Install the Magnets: Press the magnets into the holes. If necessary, lightly sand the magnets’ sides for a snug fit. No glue should be needed due to the tight fit.
Finishing Touches:
- Apply Finish: Coat your key holder with boiled linseed oil for a protective and easy-to-repair finish.
- Install Mounting Hardware: Measure and mark the placement for your hanger. Pre-drill holes (using the tape trick to prevent going too deep) and install the hardware. Trim any excess screw length.
Video Tutorial
For a step-by-step video tutorial on how to make your own DIY State-Shaped Magnetic Key Holder, check out this YouTube video.
It pairs well with this written guide, offering a visual complement to the techniques detailed here, making the process clear and approachable for crafters of all skill levels.
By following these instructions, you’ll have crafted a unique and personal item that not only celebrates your home state but keeps your keys organized and within easy reach.
2. How to Make a DIY Home Decor Key Holder Using Dollar Tree Items
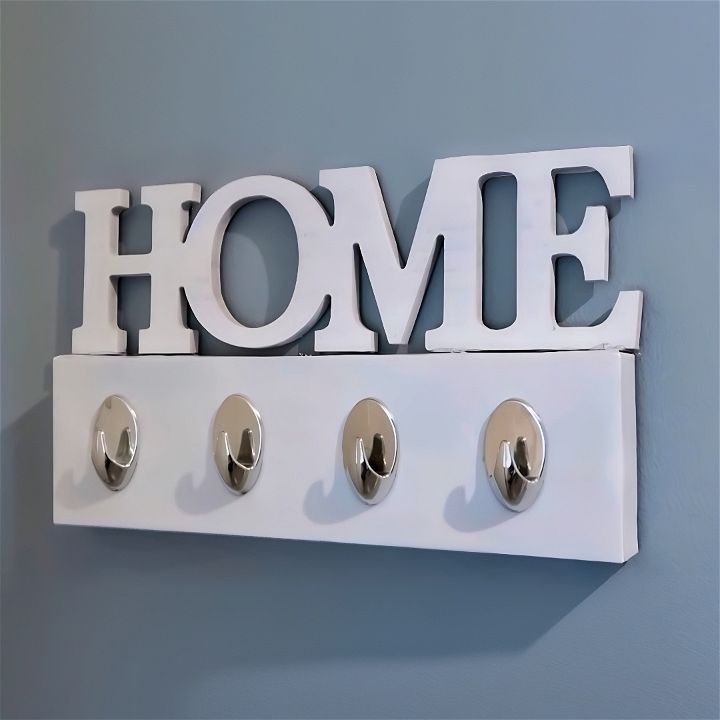
Making a key holder that adds a touch of home decor does not have to be expensive or complicated. With just a few items from the Dollar Tree, you can craft a beautiful and functional key holder. This guide will take you through the process step by step, ensuring a straightforward and enjoyable project. Let’s dive in!
Needed Supplies
First, make a quick trip to your local Dollar Tree or similar discount store to gather a few supplies:
- Self-adhesive hooks (found in the tool section)
- A “Home” wood sign (feel free to choose any design that has a wider surface to work on)
- A rectangular wall plaque (this will serve as the base of your key holder)
- White spray paint
- E6000 glue (or any strong adhesive)
- Hot glue gun with glue sticks
Step 1: Preparing Your Pieces
Start by prepping your wood sign and wall plaque for painting. If your sign comes with any additional decorations like butterflies, you might need to remove them to make a smooth surface. Once your pieces are ready, take them outside or to a well-ventilated area and begin spray painting them white. Depending on their original color and material, the plaque might need up to three coats, whereas the sign might only need two. Ensure all edges and surfaces are evenly covered.
Step 2: Adhering the Pieces Together
After your spray-painted pieces are dry, it’s time to attach them together. Here’s where you’ll need your E6000 glue and hot glue gun. Apply E6000 glue for a strong, lasting hold and add some hot glue for immediate adhesion. Be cautious with areas that are elevated or have details that glue could seep through – like the “O” in “Home”.
Position the “Home” sign onto the rectangular plaque and press firmly. If your sign doesn’t sit completely flat against the plaque, consider reinforcing it with additional hot glue or even popsicle sticks on the back for extra support.
Step 3: Adding the Hooks
Once your base is complete and the glue has dried, plan out where you’d like to place your hooks. Four hooks evenly spaced should suffice, but feel free to add more if needed. The great thing about self-adhesive hooks is that you simply need to peel off the back and stick them in place. For this project, additional glue for the hooks is optional since they’ll only hold keys, which are relatively lightweight.
Where to Hang Your Key Holder
Think about where this key holder will be most useful. Hanging it near your entryway, like in a laundry room or by the front door, could be ideal. It’s not only functional but also adds a charming touch to your home decor.
Video Tutorial
For a step-by-step video tutorial on how to make this DIY key holder, check out this YouTube video: Dollar Tree DIY – Home Decor Key Holder. It pairs excellently with this written guide, providing visual cues that make following along even easier.
By following these steps, you’ve created a stylish and practical key holder with simple items from the Dollar Tree. This project shows that with a little creativity, you can enhance your home’s organization and decor without breaking the bank.
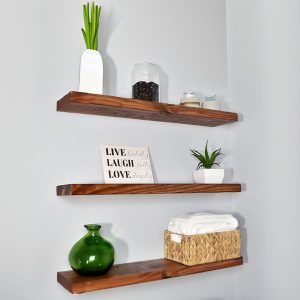
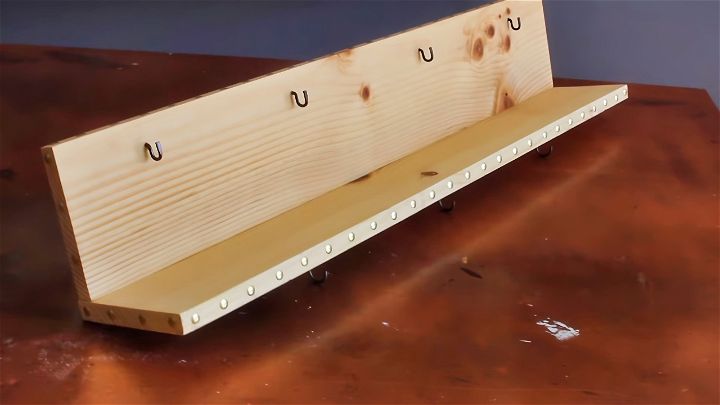
3. Easy DIY Key Holder with Shelf
Making a practical and stylish DIY key holder with shelf can be a fun weekend project that not only solves the problem of lost keys but also adds a personal touch to your home decor. Whether you’re a DIY beginner or a woodworking enthusiast, this simple guide will help you craft a unique key holder shelf from the ground up. No fancy tools or complex skills required – just some scrap wood and a dash of creativity!
What You’ll Need
- Two pieces of scrap wood (34 inches by 5.5 inches each, or size according to preference)
- Drill and drill bits
- Mini Kreg jig or similar (for pocket hole screws)
- Wood glue
- Pocket hole screws
- Hooks (for keys and accessories)
- Sunglasses (optional, for size reference)
- Pencil for marking
- Wood stain (natural color or your choice)
- Gold pushpins (optional, for decoration)
- Hammer
- Simple picture hangers
- Ruler (for spacing decorations)
Step 1: Prepare Your Wood
Start by choosing two pieces of scrap wood. If you don’t have these exact measurements, feel free to adjust the size based on your available materials or desired shelf size. Remember, the goal is to make a key holder that suits your space and needs.
Step 2: Attach the Wood Pieces
Position one wood piece on top of the other to form an L-shape, which will become your shelf. Using a mini Kreg jig, drill pocket holes in the piece that will sit horizontally (the shelf part). Pocket hole screws are great for beginners as they provide a strong hold without needing advanced woodworking skills.
Step 3: Preliminary Hook Placement
Before securing the wood pieces together, decide where you want to place your hooks. Consider what you’ll hang on this shelf – keys, sunglasses, accessories – and mark the spots with a pencil. Drill starter holes at these marks to make screwing in the hooks easier later on.
Step 4: Assemble the Shelf
Apply wood glue where the two pieces of wood meet. Then, secure them together with pocket hole screws. Wipe away any excess glue for a clean finish.
Step 5: Stain Your Shelf
Once assembled, stain the wood in a natural or your preferred color. Staining brings out the beauty of the wood and adds a polished look. Allow the stain to dry completely before moving on to the next step.
Step 6: Add Decorative and Functional Touches
After the stain has dried, screw the hooks into their pre-drilled spots. For an extra decorative touch, measure and evenly space gold pushpins around the edges of your shelf for a chic, finished look. Use a hammer to gently tap them into place.
Step 7: Attach Picture Hangers
On the back of the shelf, attach simple picture hangers with a hammer. These will be used to mount your key holder shelf on the wall.
Installation
Choose a convenient spot on your wall, ideally near your entrance, and hang your newly created key holder shelf. Now, you’ll have a stylish and functional place to keep keys, sunglasses, and other small items organized.
Video Tutorial
For a step-by-step visual guide, watch the DIY Easy Key Holder Shelf YouTube video. It pairs excellently with this written guide, showcasing the techniques discussed here in an engaging and straightforward manner.
By following this simple guide, you can transform a few pieces of scrap wood into a beautiful and practical key holder shelf. Not only does this project help keep your essentials organized, but it also allows you to express your creativity and customize your living space to better suit your needs and aesthetics. Happy DIYing!
DIY Key Holder FAQs
Making a DIY key holder is a great way to add a personalized touch to your home. Below are some frequently asked questions to help you get started on your project.
What materials do I need for a basic DIY key holder?
For a basic DIY key holder, you’ll need:
- A piece of wood (the size depends on your preference and design)
- Hooks or knobs for hanging keys
- Paint or stain (optional, for decoration)
- Sandpaper (to smooth the wood)
- A drill (for making holes for the hooks)
- Screws or adhesive (to attach the hooks to the wood)
Can I make a key holder without drilling?
Yes, you can make a key holder without drilling by using self-adhesive hooks. These hooks come with a sticky back that can be directly attached to your chosen surface. Keep in mind, however, that adhesive hooks might not be as strong as those attached with screws.
How do I choose the right size for my DIY key holder?
The size of your DIY key holder depends on the available space where you plan to hang it and the number of keys you need to store. For a small space or a few keys, a compact design might be best. If you have many keys or want to add decorative elements, consider a larger size.
How can I make my key holder match my home decor?
To make your key holder match your home decor, consider the following:
- Choose a wood stain or paint color that complements your existing decor.
- Select hooks or knobs that match your style, whether it’s modern, rustic, or vintage.
- Add decorative elements, such as stencils, decals, or hand-painted designs, to personalize your key holder.
Is it possible to make a magnetic key holder?
Yes, making a magnetic key holder is possible and relatively easy. You will need:
- A piece of wood (for the base)
- Rare-earth magnets (these are strong magnets that will hold your keys securely)
- Drill (to make recesses for the magnets)
- Glue (to secure the magnets in place if needed)
Follow the instructions for installing the magnets into the wood, and ensure they are flush with the surface to make a seamless look.
How do I maintain my DIY key holder?
To maintain your DIY key holder, follow these tips:
- Dust it regularly to prevent buildup.
- If it’s made of wood and finished with a sealant, reapply the sealant every few years to protect the wood.
- Tighten any loose screws or hooks to ensure they remain secure.
- If you used adhesive hooks, check their adhesion periodically and replace them if they start to lose their stickiness.
Can I add additional features to my key holder?
Absolutely! Here are a few ideas for additional features:
- Add a small shelf on top for mail, sunglasses, or other small items.
- Include a mini chalkboard or whiteboard for notes or reminders.
- Incorporate a photo frame to add a personal touch.
- Attach a small basket or container for loose items like change or receipts.
Remember, the key to a successful DIY key holder is creativity and personalization. Don’t be afraid to experiment with different designs and features to make a homemade key holder that’s both functional and a reflection of your style.


