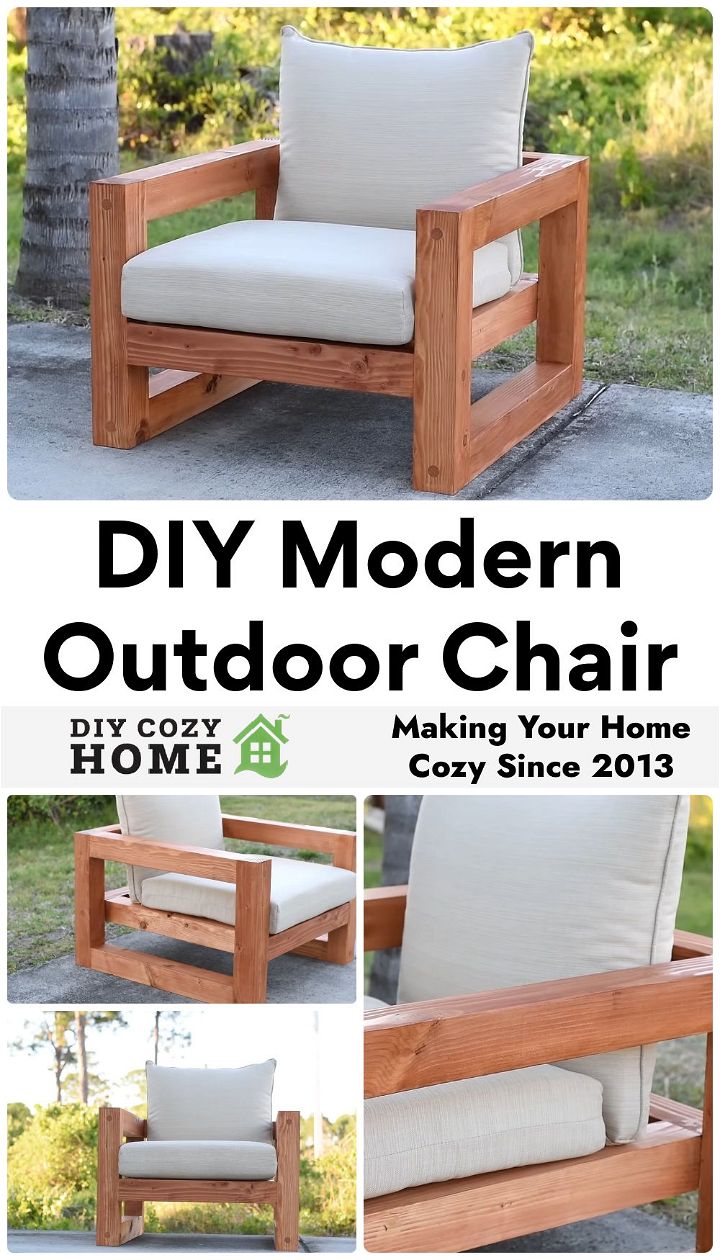
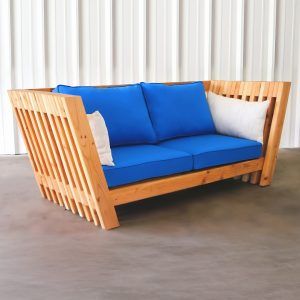
Making your own DIY outdoor chair can transform your garden or patio into a stylish, comfortable haven. This guide brings to the table a unique combination of firsthand experience, challenges overcome, and specialized expertise in DIY and carpentry. Drawing inspiration from a gap in the market for non-pressure treated, aesthetic 4×4 Douglas Fir outdoor furniture, this guide aims to equip you with the knowledge and skills to build a DIY outdoor chair that will stand the test of time.
What Will You Achieve by the End of This Guide?
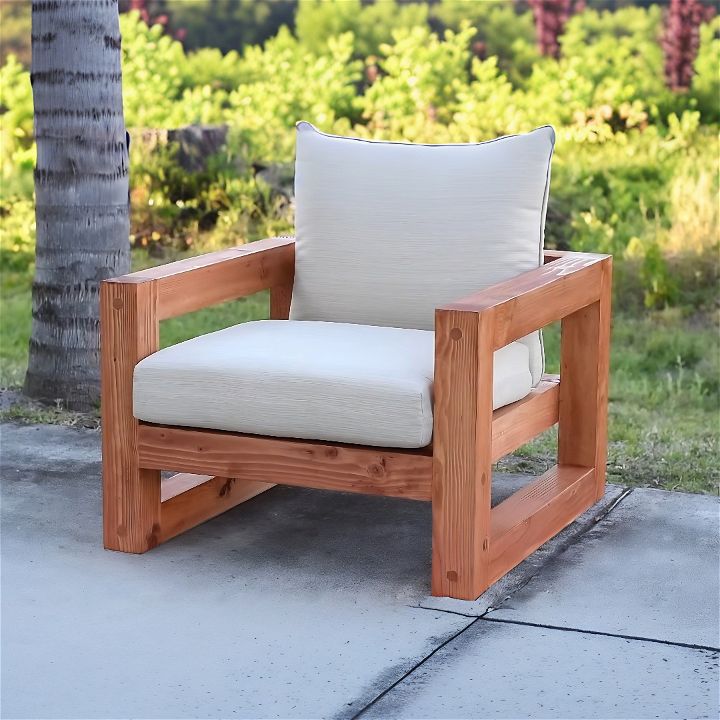
By following these instructions, you will learn how to create a durable, modern outdoor chair from 4×4 Douglas Fir wood. This DIY outdoor chair project tackles common challenges, such as working with bulky lumber, and offers creative solutions for those with limited access to advanced tools. This guide will also enhance your skills in wood joining, sanding, staining, and finishing, resulting in a beautiful piece of furniture that you can be proud of.
Step-by-Step Instructions
Learn how to make a DIY outdoor chair with our easy step-by-step instructions below:
Materials and Tools:
- 4×4 Douglas Fir lumber
- Miter saw or circular saw
- Joiner (optional)
- Table saw
- Reciprocating saw, circular saw, or handsaw
- Multi-tool
- Wood glue
- Five-inch lag screws
- Wooden dowels
- Drill with a variety of bits
- Clamps or ratchet straps
- Scrap wood for spacers
- Wood conditioner, stain, and polyurethane for finishing
Building the Chair:
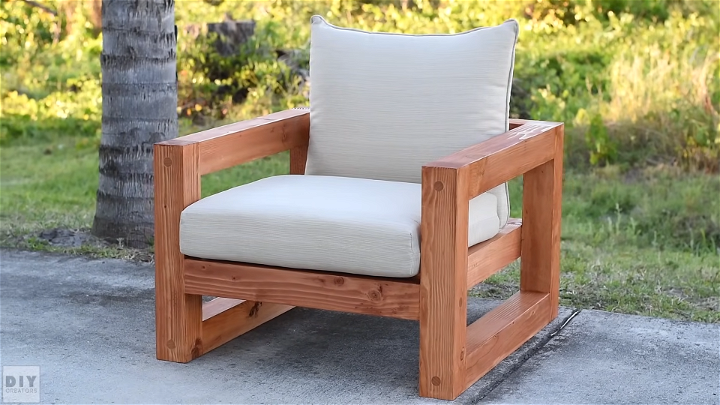
Prepare the Lumber:
- Cut the 4x4s into the required lengths for the seat, back, arms, and legs of the chair. Use a miter saw for accuracy and ease.
Joining the Pieces:
- If available, use a joiner to smooth the lumber, reducing sanding time. This step is not mandatory but helps in achieving a smoother finish.
Creating the Seat and Back Support:
- For the parts of the seat that connect with the chair’s arms, cut rabbets on both ends using a table saw. This can also be achieved with a handsaw by marking the cuts and carefully removing the unwanted wood.
- Use a guide to ensure consistent spacing and angles, especially for the connections that will support your weight.
Assembling the Arms:
- Apply wood glue to all joints before screwing them together to ensure a solid, squeak-free chair.
- Use lag screws for a robust connection. Drill pilot holes to prevent the wood from splitting.
Connecting the Arms to the Seat and Back:
- Position the arms correctly using scrap wood as spacers to ensure the correct height.
- Glue and then screw the connections for added strength.
Adding the Seat Slats:
- Space the slats evenly across the frame, using scrap pieces of wood as spacers for consistency. Screw these from below for a clean finish.
Final Touches:
- Cover the screw holes with wooden dowels for a sleek look. Cut them flush with a saw.
- Sand the entire chair to smooth any rough edges and prepare it for finishing.
Staining and Finishing:
- Apply wood conditioner to prevent blotchiness in the stain.
- Choose a stain that complements your outdoor space and apply it following the manufacturer’s instructions.
- Finish with two coats of polyurethane to protect the chair from the elements.
Troubleshooting and Tips:
- Lag Screws: Be cautious not to overtighten the lag screws, as this can crack the wood. The glue will provide additional strength.
- Finishing: Consider the environment where the chair will be used. A UV-resistant polyurethane is a must for sunny areas.
- Customization: Feel free to adjust the dimensions to suit your needs, such as making the back higher for added comfort.
Video Tutorial
Want a visual demonstration? Watch a step-by-step video tutorial on YouTube for this project. It provides a clear and easy-to-understand visual walkthrough of the techniques, making it a great companion to this written guide.
YouTube video URL: DIY Outdoor Chair Tutorial
Finishing and Protection
Why Finishing Outdoor Furniture is Important
Outdoor furniture faces the elements—sun, rain, and wind. Without proper finishing, wood can warp, crack, or rot. Finishing also enhances the beauty of the wood, highlighting its natural grain. It’s an essential step in outdoor furniture maintenance.
Step-by-Step Guide to Applying Finishes
Paint:
- Prepare the Surface: Sand the furniture to remove rough spots or old finish. Clean off the dust.
- Prime: Apply a coat of primer to help the paint adhere better and last longer.
- Paint: Use a paintbrush or roller to apply exterior paint. For best results, apply two coats, letting it dry between applications.
Stain:
- Sand and Clean: Smooth the wood and clean it thoroughly.
- Apply Stain: Use a brush or cloth to apply wood stain evenly. Work in sections, wiping off excess as you go.
- Seal: After the stain dries, apply a clear outdoor sealant for extra protection.
Oil:
- Clean the Wood: Ensure the wood is dry and clean.
- Apply Oil: Use a clean cloth to rub in the oil in the direction of the grain. Linseed or teak oil is good for most woods.
- Wipe Off Excess: After 10-15 minutes, wipe off any excess oil. Allow it to dry completely.
Recommended Products Based on Wood Type
- Teak: Teak oil enhances its natural weather resistance.
- Cedar: A clear sealant will protect without hiding its color.
- Pine: Use paint or a stain with a built-in sealer for extra protection.
Upholstery & Cushioning
Making Simple Cushions or Seat Pads
- Measure: Measure your chair or bench to determine the size of the cushion.
- Cut Foam: According to your measurements, cut the foam padding for your cushion.
- Cut Fabric: Cut your fabric, leaving extra space for seams.
- Sew: Sew the fabric pieces together, leaving one side open to insert the foam. Then, sew the opening closed.
Weather-Resistant Fabrics and Fillings
Fabrics: Look for outdoor or marine fabrics like Sunbrella, which are fade and mildew resistant.
Fillings: Use polyurethane foam or polyester fiberfill, which are quick-drying and prevent mildew.
Learning Sewing Skills
If you’re new to sewing, plenty of resources can help you get started. Websites like YouTube and Sew Mama Sew have countless tutorials for beginners. For more structured learning, consider online courses from platforms like Udemy or Craftsy. These resources can guide you through the basics of sewing to more advanced upholstery skills.
Conclusion
Building a DIY outdoor chair yourself is a rewarding project that not only enhances your skills but also provides you with a unique piece of furniture. By following these steps and utilizing the tips provided, you’ll create a durable, stylish outdoor chair that you’ll enjoy for years to come. Happy building!
FAQs for DIY Outdoor Chair
Find answers to all your FAQs on materials, tools, construction, and more!
Can I use different types of wood for this project?
Yes, you can use different types of wood for your DIY outdoor chair project. Douglas fir is commonly recommended due to its durability and aesthetic appeal, but feel free to choose based on availability, budget, and personal preference. Ensure the wood you select is suitable for outdoor use or treated for weather resistance.
What tools do I need to build an outdoor chair?
The essential tools for building an outdoor chair include a miter saw, dowel jig, JET parallel clamps, router table-JET, Kreg K4 pocket hole jig, table saw, and Bluetooth earbuds for safety. These tools help ensure precise cuts and joins, crucial for the chair’s stability and appearance.
Can I customize the chair size?
Yes, you can adjust the dimensions of your DIY outdoor chair to suit your preferences or accommodate specific cushions. However, it’s important to maintain the chair’s structural integrity by properly adjusting all related measurements and ensuring that the chair remains stable and comfortable.
How do I find cushions that fit my DIY chair?
Finding the right cushions can be challenging due to the varied sizes and styles of DIY chairs. Many people opt to purchase outdoor cushions from home improvement stores or online retailers. If you’re looking for a more cost-effective solution or specific dimensions, consider making your own cushions using outdoor fabric and foam.
What is the weight limit for these chairs?
While the exact weight limit for DIY outdoor chairs can vary based on construction and materials, these chairs are designed to be sturdy and durable. If constructed following the guide and using recommended materials, they should accommodate a wide range of weights comfortably. It’s always a good idea to test the chair under controlled conditions if you’re concerned about its capacity.
How do I protect my outdoor chair from the elements?
To protect your outdoor chair from weathering, apply a suitable outdoor sealant over the wood. This can include waterproof varnishes, stains with built-in weather protection, or specialized outdoor paint. Regular maintenance, such as cleaning and reapplying sealant as needed, will extend the life of your chair.
Are DIY outdoor chairs comfortable?
Yes, DIY outdoor chairs can be very comfortable, especially when designed with ergonomic considerations and paired with quality cushions. The comfort level can be enhanced by adjusting the chair’s back angle, seat depth, and cushion thickness to suit your preferences.
Share on Pinterest
Let’s make your Pinterest boards even more fabulous – save this DIY outdoor chairs idea now and make your Pinterest followers say, “wow!”
