Creating your own vacuum former can be a rewarding project that adds a new level of customization to your DIY crafts. This guide is designed to take you through the process step-by-step, making it accessible and doable for anyone interested in DIY vacuum forming. From gathering the materials you’ll need, to the final touches on your creation, we cover all the important bases to get you started on making your very own vacuum former.
Not only will we guide you through constructing a basic model, but we’ll also explore ways to build a bigger, better version for those looking to take their vacuum forming skills to the next level. Each section is packed with useful tips and detailed instructions to ensure your success. Ready to create unique and customized pieces with your new vacuum former? Let’s dive into the next section and get started.

1. Easy DIY Vacuum Former
Making a vacuum former at home is simpler than you might think. With this easy-to-follow guide, you’ll learn how to craft detailed molds that can be used for making unique chocolate designs, like a chocolate NOKIA phone. This project is perfect for beginners and requires basic tools and materials.
What You’ll Need:
- Sheets of wood (plywood or MDF, no more than a quarter of an inch thick)
- Two by one piece of wood for the sidewalls (a full foot length)
- Vacuum cleaner that fits inside the wood frame
- Plastic sheets for vacuum forming
- Silicon sealant or caulk
- Small clamps
- Drill (with drill bits suitable for wood)
- Jigsaw or coping saw
- Sandpaper
- Clear varnish (optional)
- Draught proofing tape (optional)
- Oven or grill
Step-by-Step Guide:
1. Preparing the Wood Frames
- Begin by cutting the top and bottom plates from your plywood or MDF, using an A4 sheet as a template for size.
- Cut the two by one wood to create the side walls. Ensure that your vacuum cleaner nozzle will fit snugly within this frame.
- Sand the edges and surfaces to ensure they are smooth and free from splinters.
2. Drilling Holes for Suction
- Use a template or measure and mark holes approximately 3/4 of an inch apart across the wood surface where you’ll be placing your object to mold.
- Drill the holes, optionally drilling in reverse to minimize splintering on plywood.
- Sand the surfaces again to clean up any rough areas around the drilled holes.
3. Assembling the Frame
- Apply silicon sealant or caulk along the edges of the wood pieces to glue them together. The sealant aids in creating an airtight frame, essential for effective vacuum forming.
- Use clamps to hold the pieces together as they dry.
4. Preparing the Plastic Holder
- Create a frame slightly larger than your vacuum former frame from the remaining wood. This frame will hold the plastic sheet in place during the forming process.
5. Finishing Touches
- Apply a clear varnish for a finished look, though this step is optional.
- Attach frame guides to the sides of your former to help locate the plastic holder during the vacuum forming process.
- Adding draught proofing tape on the inside edges where the plastic makes contact with the former may improve suction, especially for vacuum cleaners with lower power.
Using Your Vacuum Former
- Prep Your Mold: Place the object you wish to make a mold of inside the vacuum former frame.
- Heat the Plastic: Cut your plastic sheet to fit the frame and heat it in the oven or under a grill until it sags slightly.
- Forming Process: Quickly place the heated plastic and frame over your mold and turn on the vacuum cleaner. The plastic will be sucked down, forming around your object.
- Cool Down: Allow the plastic to cool and harden before removing your newly formed mold.
Enjoy Your Creations
With the mold ready, you can now use it to create all sorts of interesting items, such as chocolate replicas of a NOKIA phone. The level of detail the vacuum former can achieve is perfect for intricate designs and fun projects.
Video Tutorial
For a step-by-step video tutorial, watch this helpful guide:
It pairs perfectly with this written guide, making the whole process visual and easier to grasp.
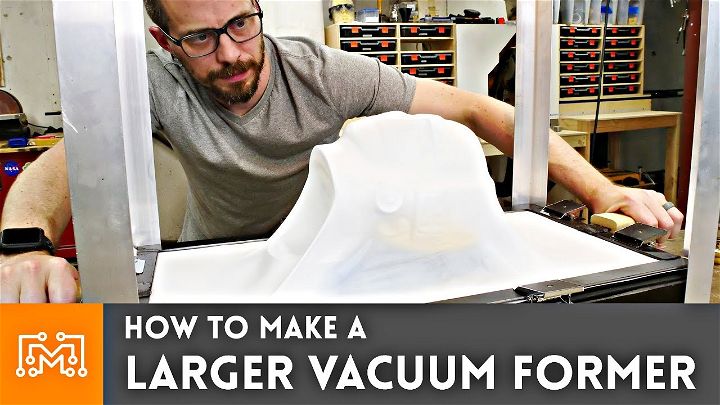
2. Making a Bigger, Better DIY Vacuum Former
Hello, I’m Bob! If you enjoy crafting and inventing, you’re in the right place. A bit of history: my first project video ever was a vacuum former. Fast forward to today, and I’m here to show you how to make an upgraded version. Let’s dive into building a bigger, better vacuum former together, and remember, you can adapt these steps based on your needs and tools available.
What You’ll Need
- $50 Space Heater: A simple and affordable solution for our heating element.
- MDF (Medium Density Fiberboard): We’re building our structure with this versatile material.
- Shop Vac: A key component for our vacuum system. If you’ve got one, that’s perfect!
- Materials: Picking up some thin plastic and possibly styrene for forming.
- Tools: Basic workshop tools like a saw for MDF, drill, CNC (optional), and for metalwork, a metal cutting miter saw and welding equipment.
Understanding Vacuum Forming
Vacuum forming is a neat process! You heat a thin plastic sheet until it’s soft, then stretch it over a shape you want to copy. Next, vacuum out the air underneath, and the plastic conforms to the shape, creating a replica. It’s useful for a vast array of creative or practical projects.
Building the Structure
- Creating the Boxes: We’re crafting two main sections – one for heating and one with holes for the vacuum. These will be made of MDF. Remember to measure and cut the pieces according to the size of your project.
- Assembling and Heating: After cutting, assembling is straightforward. Make sure your heating element fits snugly in its respective box. A little tip here: ensuring a good fit now saves troubleshooting later.
- Vacuum Section: Drill a grid of holes in the bottom box for the vacuum. This will be the bed where your magic happens. The more uniform the holes, the better the suction.
Mounting and Final Assembly
- Secure Your Heater: Trim unnecessary parts of the heater for a perfect fit. Safety note: ensure good ventilation when working with plastic or soldering.
- Joining the Boxes: Use angle brackets to connect the top and bottom sections securely. This develops a sturdy structure for your vacuum former.
- Adding Magnets: For holding your plastic sheet frame in place, magnets are a simple yet effective solution.
Making it Work
- Preparing the Plastic: Once your structure is complete, it’s time to test! If you don’t have specialized plastic like styrene, thin plexiglass is a start for experimenting.
- Sealing for Success: Adding a gasket around the edge of the vacuum box improves performance. You can make a simple one with foam strips.
- Form it: With everything set up, heat your plastic until it droops, then quickly move it to the vacuum section. The vacuum sucks the plastic down, molding it over your shape.
Video Tutorial
This tutorial will show you how to do it, step by step. You can also refer to our written guide to make it easier to understand.
Conclusion and Tips
Building this vacuum former has been a fun and enlightening process. Remember, the quality of your form will depend on several factors, including heat distribution, material thickness, and vacuum strength. Don’t be afraid to experiment to find what works best for you. Now, I’m curious – what projects do you have in mind that could benefit from vacuum forming? Let’s chat in the comments!
Troubleshooting Guide
Common Culprits: Your Vacuum Forming Woes
Let’s break down the most frustrating issues you might encounter as a beginner:
| Problem | What It Looks Like |
|---|---|
| Uneven heating and stretching | Thin, stretched-out areas next to thick, under-formed sections |
| Wrinkles or bubbles | Wrinkles resemble loose fabric, bubbles are raised areas of trapped air |
| Tears in the plastic | The plastic rips or splits, especially along thin parts |
| Weak suction or incomplete forming | The plastic doesn’t fully conform to your mold’s shape |
| Sticking to the mold | The formed plastic is difficult or impossible to remove |
Solving the Mystery: Why Did This Happen?
For each problem, there are several potential causes. Let’s pinpoint the most likely suspects:
| Problem | Possible Causes |
|---|---|
| All of the above | * Incorrect heating temperature (too hot or too cold for the specific plastic) |
| Uneven heating, wrinkles, tears, incomplete | * Uneven heat distribution from your heat source |
| Wrinkles, tears, sticking | * Mold design with sharp corners, undercuts, or rough surfaces |
| Uneven heating, incomplete forming | * Not enough heating time |
| Weak suction, incomplete forming | * Leaks in your vacuum setup (frame, hoses, seals) |
| Sticking | * No mold release agent used (more important with some plastics and molds) |
Step-by-Step Solutions: Fix It Fast
Now, let’s tackle these problems head-on with actionable fixes:
- Temperature Tweaks: Refer to a chart specifically for your type of plastic and adjust your heat source. Too hot? A bit less heat. Too cold? You need a bit more!
- Heat Check: If certain areas are hotter, use a heat gun for targeted heating or try repositioning your plastic relative to the heat source.
- Smooth Operator: Sand any sharp edges or rough surfaces on your mold.
- Give It Time: Increase heating time slightly for thicker plastics or more detailed molds.
- Seal the Deal: Listen carefully for hissing! Patch up leaks with weatherstripping or vacuum tape.
- Release Agent to the Rescue: For tricky molds, apply a spray-on mold release made for plastics.
The Importance of Experimentation: Learning from Your “Mistakes”
Don’t get discouraged! Troubleshooting is how you get better at vacuum forming. Analyze what went wrong:
- Was the plastic too thin in places?
- Did you notice your mold getting stuck?
Each attempt teaches you something. Adjust your approach and try again!
Extra Tip: Keep a notebook to jot down the type of plastic, your temperature settings, and what worked well (or what didn’t). This becomes a valuable resource for future projects.
FAQs: Answers to Your Vacuum Forming Questions
Get your vacuum forming questions answered with our comprehensive FAQs guide. From materials to process, we cover it all. Improve your knowledge today!
What kind of plastic can I use for vacuum forming?
There are several types of plastic that work well for vacuum forming. Some of the most popular options include ABS (great for its strength and outdoor use), HIPS (affordable and easy to form), PETG (clear and food-safe), and Kydex (super durable for items like holsters). It’s important to look into the specific properties of each plastic to find the best fit for your project.
How thick should my plastic sheet be?
The ideal thickness depends on what you’re making. For small objects with fine details, use thinner sheets (around 0.020-0.060 inches). Larger projects needing some sturdiness work better with 0.080-0.125-inch thickness. If you need something really heavy-duty, go for 0.187 inches or thicker! Don’t be afraid to experiment to see what works best for your needs.
Can I use my home oven to heat the plastic?
While it’s technically possible, using your home oven for vacuum forming isn’t recommended. Home ovens often have uneven heating and limited temperature control, which can make it tricky to get consistent results. A dedicated heat gun or even a toaster oven will offer greater control and a safer experience.
How do I know when the plastic is ready to form?
The plastic is ready to form when it sags slightly and develops a glossy look. This indicates it’s reached the ideal temperature for shaping. Try experimenting with small scrap pieces to get a sense of how this “ready” state looks for different types of plastic.
My plastic is tearing when I form it, what am I doing wrong?
There are a few reasons why your plastic might be tearing. It could be that it’s not heated enough, so try increasing the temperature or heating time. Another possibility is it’s cooling down too quickly, so make sure to form it as soon as you remove it from the heat source. Finally, check your mold for any sharp corners or edges, as these can also cause tearing.
How do I get a strong vacuum seal?
The secret to a strong vacuum seal is ensuring all your surfaces are smooth and there are no leaks. Your frame and the platen (the surface where you place the plastic) should both be as flat as possible. Invest in good quality weatherstripping or vacuum-specific tape to seal the edges. Before you try forming, listen carefully for any hissing sounds, which could indicate a leak.
Can I vacuum form over 3D printed objects?
Yes, you definitely can! 3D printing allows you to create all sorts of unique and intricate molds for vacuum forming. Just remember to use a high-temperature filament when printing your mold to withstand the heat. Sanding the surface of your 3D print will give you a smoother mold and a better result on your final formed piece.
Can I make two-part molds for complex shapes?
Definitely! Two-part molds let you create objects with greater complexity. When designing these types of molds, remember to add in slight draft angles (angled surfaces) for easier removal of the formed piece. You might also consider including registration pins to ensure your mold halves align perfectly.
What safety equipment do I need for vacuum forming?
Safety is super important! Always have heat-resistant gloves to protect yourself when working with hot plastic. Safety glasses are also essential to prevent any debris from flying into your eyes. And, of course, a fire extinguisher should be standard equipment in any workshop environment.
Where can I find more project ideas and tips?
There are tons of resources out there! Check out online forums dedicated to vacuum forming, search for DIY tutorials and project videos on sites like YouTube or Instructables, and see if your local library has any books on the subject.


