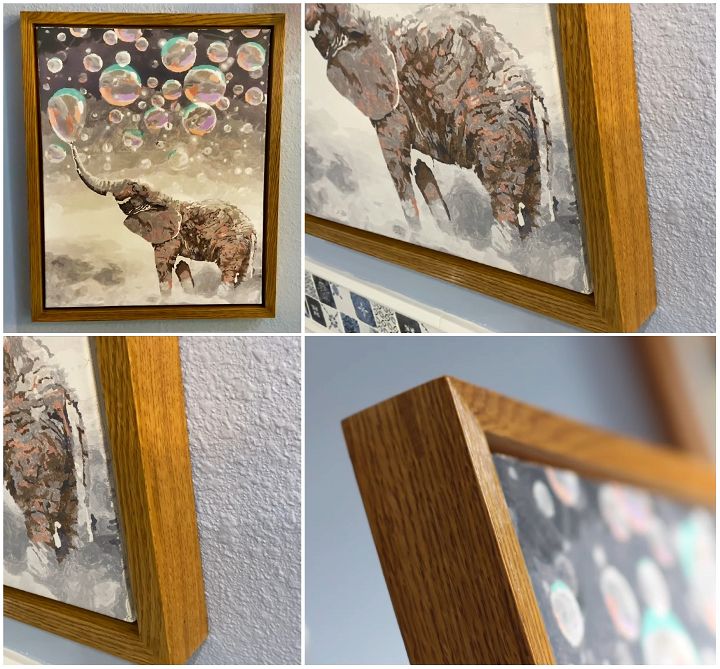
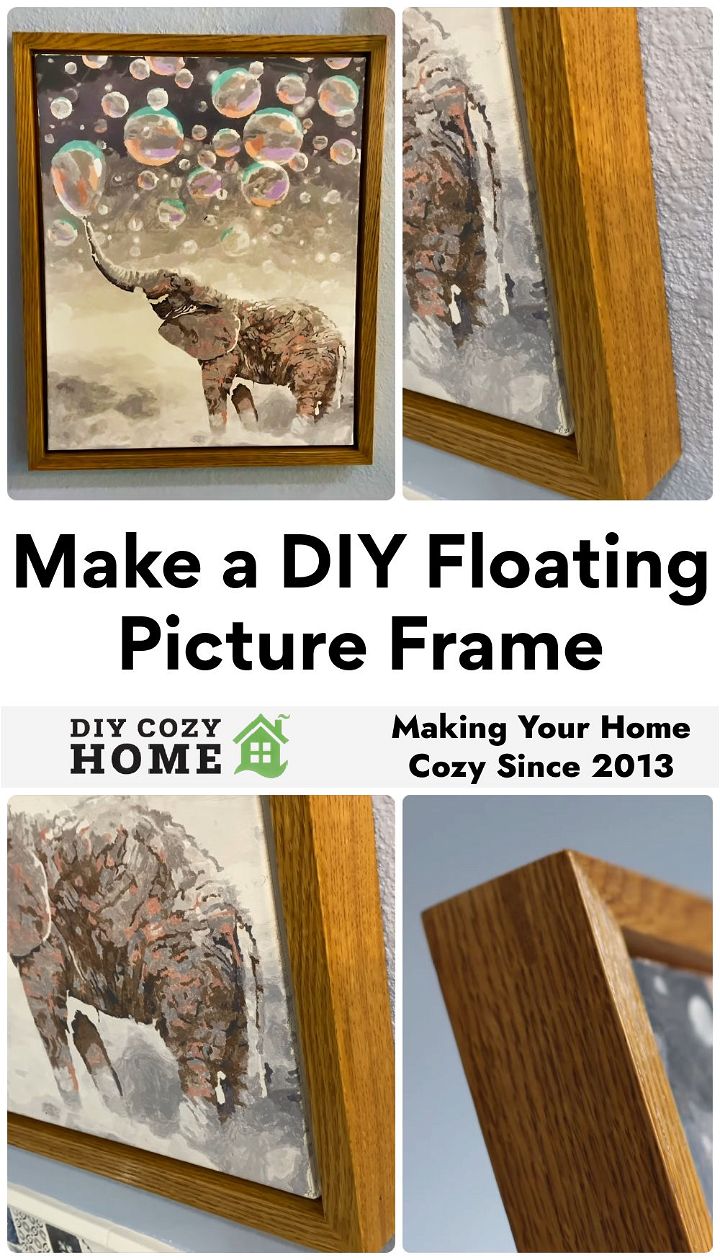
Making a DIY floating picture frame is an enjoyable DIY project that not only enhances the visual appeal of your artwork but also provides a unique, modern touch to your decor. Whether you’re a seasoned craftsman or a novice in woodworking, this DIY floating frame guide aims to equip you with all the information needed to successfully make your own floating picture frame.
Throughout my experience in crafting various types of picture frames, I’ve encountered several challenges and learned valuable lessons that I’ll share with you, ensuring you can avoid common pitfalls and achieve a great result.

What Will I Get Out of This?
By following this guide, you’ll learn how to make a floating picture frame, a stylish alternative to traditional framing methods that makes your artwork appear as if it’s levitating within the frame. This guide covers everything from selecting the right materials to the final assembly, including tips on ensuring durability and aesthetic appeal. Regardless of the artwork size or your woodworking skill level, this guide is designed to help you achieve a professional-looking frame.
Materials Needed and Their Purpose
- Wood (e.g., Red Oak): Selected for its durability and beautiful grain, making it ideal for picture frames.
- Glue & 23 Gauge Pin Nailer (or clamps): These are used to securely attach the frame pieces together. While a pin nailer speeds up the process, clamps can be used as an alternative for those who prefer not to use nails.
- Miter Saw: Essential for cutting precise 45-degree angles on the frame pieces, ensuring a perfect corner fit.
- Strap Clamp: Aids in holding the frame pieces tightly together while the glue dries.
- Biscuit Joiner & Plywood (for making splines): Optional. Splines add strength to the frame corners, making the frame more durable.
- Finishing Product (such as Tung Oil or similar): Protects the wood and enhances its natural beauty. Choose based on the desired finish and where the frame will be displayed.
- Mounting Plates & Screws: For securing the artwork to the frame. Pre-drilling these ensures an easier assembly and avoids damaging the frame or artwork.
- Playing Cards: A clever, simple way to evenly space the artwork within the frame during assembly.
Instructions
- Prepare Your Materials: Cut your chosen wood to rough dimensions, then finalize by trimming to the exact sizes needed. Ensure accuracy in measurements to maintain even spacing around your artwork.
- Assembly Preparation: Glue mounting plates to the frame pieces before assembling. These will later help in attaching the artwork. If using a pin nailer for speed, do so carefully to avoid splitting the wood.
- Cutting Angles: Make sure your miter saw is set to a perfect 45-degree angle for cutting. This accuracy is crucial for the frame’s corners to fit seamlessly. Test on a scrap piece before proceeding.
- Frame Assembly: Glue the mitered frame pieces together, using a strap clamp to hold them tight while drying. Consider adding splines for additional strength, particularly for larger frames.
- Finishing Touches: Select a finishing product that complements the wood and your decor. Apply as per the product’s instructions for best results.
- Attaching the Artwork: Pre-drill the mounting plates then use playing cards to evenly space the artwork within the frame. This ensures a consistent “floating” gap. Secure the artwork with screws, being careful not to over-tighten.
Common Pitfalls and Troubleshooting
- Inaccurate Cuts: Double-check measurements before cutting. Inaccurate cuts can lead to gaps in the frame corners.
- Weak Joints: Ensure ample glue is applied and consider using splines for added strength, especially important for larger frames.
- Uneven Finish: Apply the finish evenly and in a well-ventilated area. Test on a scrap piece to ensure it meets your expectations.
Video Tutorial
Want a visual demonstration? Watch a step-by-step video tutorial on YouTube for making a floating picture frame. It provides a clear and easy-to-understand visual walkthrough of the techniques, making it a great companion to this written guide.
Finishing Techniques
Go beyond simple stains and paints to give your frame a unique look and added protection.
- Natural Beauty: Sometimes, the best way to finish a wooden frame is to let the wood’s own beauty shine through. Oils and waxes will bring out the rich color of the wood and protect it without hiding the unique grain patterns. Think of it like giving your frame a healthy glow!
- Distressing & Aging: If you want your frame to have a vintage charm, we’ve got the perfect tricks for you. With a few simple techniques, you can give your brand-new frame the look of a beloved antique that’s been in your family for years.
- Metallic Effects: Add a touch of glamour to your frame! We’ll show you how to use special gold or silver leaf to make it shimmer, or how to use metallic paints to create a dazzling shine. Your picture frame will look like a piece of treasure.
Mounting Variations
Explore different ways to mount your art for a truly customized floating frame.
- Shadowbox Depth: The space between your artwork and the back of the frame creates a cool shadowbox effect. By making this space deeper or shallower, you can change the whole look of your framed piece. It adds an extra dose of dimension!
- Alternative Support: There’s more than one way to hold your artwork in place! Instead of just attaching it to the back of the frame, you can use things like thin wires to make it look like it’s magically suspended, or use clear acrylic rods for an invisible support.
- Multi-Image Mounting: Want to display a whole collection of photos or artwork? A floating frame is a perfect way to show it off! Create a beautiful collage arrangement where each picture seems to float within the frame.
Customization for Different Art Types
Tailor your floating frame to perfectly showcase your unique artwork.
- Canvas Adjustments: Canvas paintings come with different edge thicknesses. Don’t worry, we’ll show you how to build your floating frame so it perfectly fits your canvas, whether it’s a standard size or a thicker gallery-wrapped canvas.
- Framing Textiles: Delicate fabrics like embroidery or tapestries deserve a special framing touch. You’ll learn how to float your fabric art so it has the spotlight it deserves, giving it a beautiful, elevated look.
- 3D Objects: Turn your floating frame into a mini display case! It’s perfect for showcasing those special objects you love, like a small sculpture, a unique rock, or your favorite keepsakes.
Conclusion
Creating a floating picture frame can be a rewarding project, adding a custom touch to your home decor. By following these detailed steps and incorporating your own creative flair, you’re well on your way to crafting a beautiful frame that showcases your artwork in style. Remember, patience and precision are key to achieving a professional-looking result. Happy crafting!
FAQs about DIY Floating Picture Frame
Learn how to make your own DIY floating picture frame with our comprehensive FAQs. Discover the expert tips.
Q1: Can I make a floating frame without a miter saw?
Yes, there are a few ways to get around this. You can buy pre-cut frames with the corners already mitered for you. If you want to work with wood, careful hand-sawing is an option, but it takes practice. Also, consider alternative materials like foam board or PVC pipe, which don’t require angled cuts at all.
Q2: My corners keep splitting! How do I fix this?
This is a common problem, but there are ways to troubleshoot it. First, consider the type of wood you’re using. Softwoods like pine split more easily, so try a harder wood like oak or maple. Secondly, always drill small pilot holes before you put in screws or nails – this helps prevent cracks. Finally, be gentle when clamping your frame; too much pressure can also cause the wood to split.
Q3: How do I make a floating frame for a canvas that isn’t gallery-wrapped?
Standard canvases need a bit of extra help to create that floating effect. You can attach small metal brackets (called L-brackets) to the back of your canvas and to the inside of your frame to give it support. Another option is to build a smaller frame that sits inside your main frame, acting like a shelf for the back of the canvas.
Q4: Can I use a floating frame for objects other than flat artwork?
Absolutely! Floating frames are a fantastic way to display small sculptures, souvenirs, keepsakes, or anything special you want to showcase. Just make sure your frame construction is sturdy enough to handle the weight of the object, and use things like museum wax, clear wire, or small hooks to keep your object securely in place.
Q5: How do I get that really clean, modern look with no visible supports?
It takes a little extra planning and some clever tricks. Careful measuring is key so you know exactly how much space you want around your artwork and can build the frame accordingly. For hidden supports, try thin acrylic rods drilled into the frame, or strong wire painted to blend in with the background.
Q6: Is there a way to make a floating frame with a really deep shadowbox effect?
Yes! You can create this dramatic look by either making a smaller frame to sit inside your main frame or by attaching thick spacers to the back of a smaller frame. The bigger the gap between the frames, the deeper the shadowbox effect!
Q7: Can I make a floating frame out of something other than wood?
Definitely! Popular choices include acrylic for a sleek, modern look, and metal for an industrial or minimalist style. You can even repurpose old picture frames or salvaged wood for a unique and eco-friendly touch. Just remember to consider the weight of your artwork and choose a material strong enough to support it!
Share for Others
Don’t keep this DIY Floating Picture Frame secret to yourself! Help your friends out and save it on Pinterest.

About the Author:
John is a woodworking enthusiast with many years of experience making unique and stylish home decor. With a focus on problem-solving, John is an expert in making functional and practical DIY projects, including his favorite one – a stunning DIY floating picture frame.

