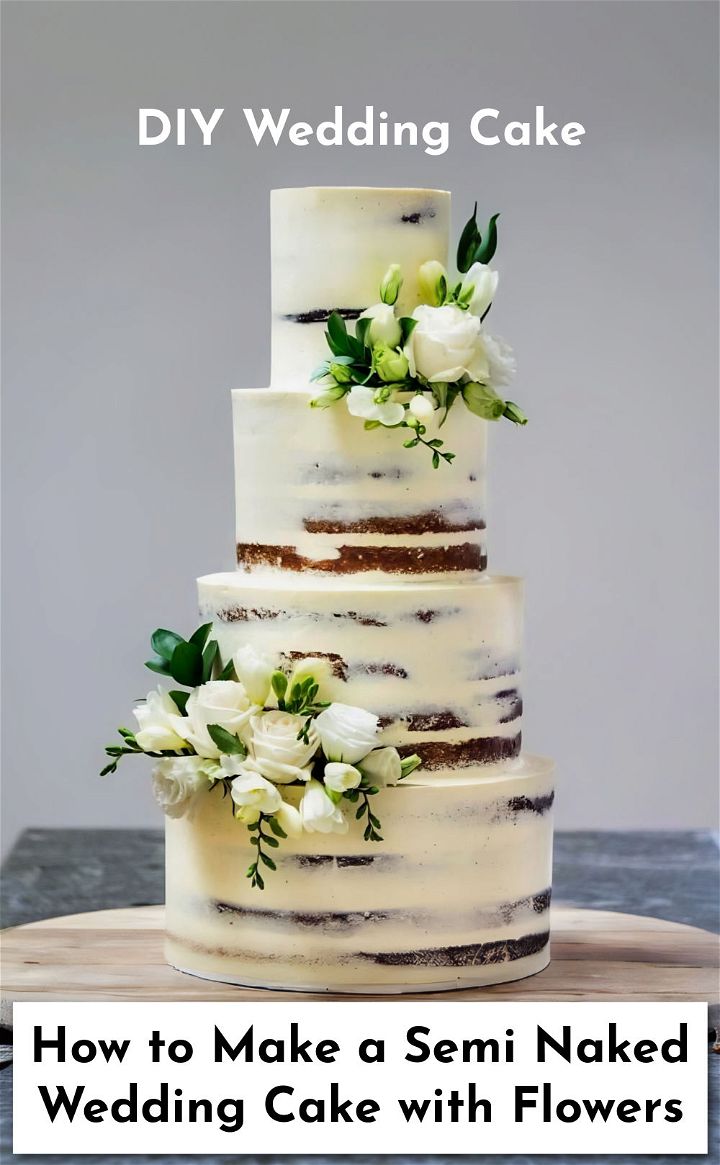
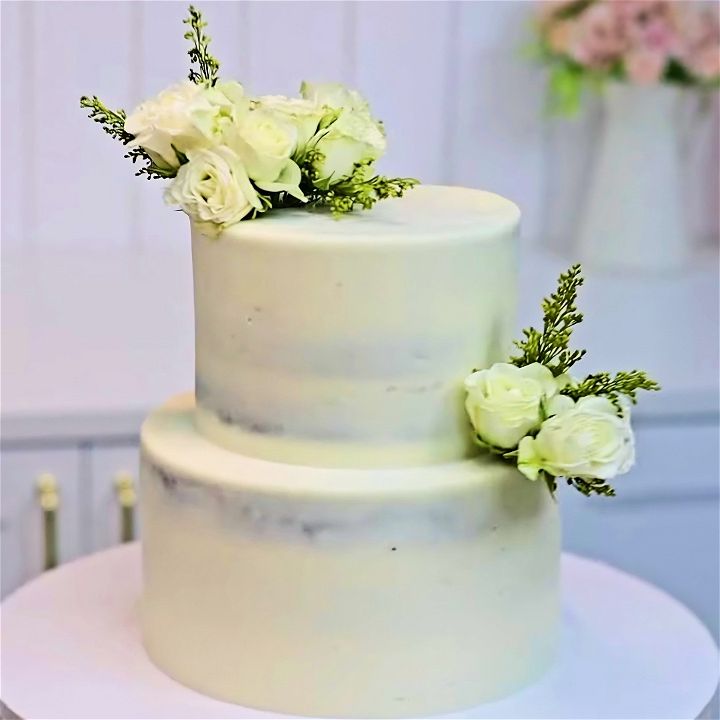
Making a semi naked wedding cake can be straightforward and enjoyable with the right guidance. This helpful guide breaks down the process into simple steps, ensuring your cake not only looks stunning but also tastes delicious. Perfect for weddings, baby showers, or any special occasion, let’s dive into making an elegant semi naked cake.

Understanding Semi Naked Wedding Cakes
Semi naked wedding cakes are a charming trend in the world of matrimonial confections. They offer a light touch of frosting, revealing the cake beneath in a stylish way. This design is perfect for those who prefer a less sweet dessert or for couples looking for a rustic yet elegant look for their wedding cake.
What is a Semi Naked Wedding Cake?
A semi naked wedding cake has a thin layer of frosting that partially covers the cake. It’s like a crumb coat, which is the first layer of frosting on a cake that traps crumbs. In this case, the crumb coat is left as the final layer, allowing the cake’s texture and color to show through.
Why Choose a Semi Naked Cake?
This cake style is not only beautiful but also practical. It’s less likely to melt in hot weather, making it ideal for summer or outdoor weddings. Plus, it’s a canvas for creativity, allowing you to decorate with fresh flowers, fruits, or even a drip of caramel or chocolate.
Choosing the Right Ingredients
The taste of your wedding cake is as important as its appearance. For a semi naked cake, the quality of ingredients is crucial because the flavor needs to shine without heavy frosting.
Essential Ingredients
For a delicious semi naked cake, start with these basics:
- Flour: All-purpose flour works well for a sturdy cake structure.
- Sugar: Granulated sugar adds sweetness and helps with the texture.
- Butter: Unsalted butter provides richness and moisture.
- Eggs: They bind the ingredients together and add fluffiness.
- Milk: It gives the cake a tender crumb.
- Vanilla Extract: High-quality vanilla extract enhances the flavor.
Tips for Choosing Ingredients
- Local and Organic: Whenever possible, choose local and organic ingredients. They’re fresher and can make a difference in taste.
- Flavor Pairings: Think about the flavors you enjoy. Vanilla is classic, but don’t be afraid to try lemon, almond, or chocolate.
- Color Considerations: Remember, the color of your cake will show through the frosting. Choose ingredients that complement your wedding’s color scheme.
By understanding what a semi naked wedding cake is and selecting the right ingredients, you’ll set the stage for a beautiful and tasty centerpiece for your special day.
Ingredients and Tools You’ll Need:
- Cake Layers (Chocolate or any flavor of your preference)
- Buttercream Frosting
- Cake Boards (same diameter as your cake layers)
- A Cake Drum (for the base tier)
- Offset Spatula
- Cake Scraper or Straight-Edged Comb
- Serrated Knife
- Cake Turntable (optional but recommended)
- Boba Straws or Support Dowels
- Piping Bag (optional)
- Fresh Flowers (for decoration, optional)
Step-by-Step Guide:
1. Prepare Your Cake Layers and Buttercream
- Ensure your cake layers are baked, cooled, and leveled. Use a serrated knife to create even layers.
- Your buttercream should be smooth and spreadable. Adjust the consistency with a little milk or icing sugar if necessary.
2. Chill Your Cake Layers
- Chill your cake layers wrapped in cling film in the freezer for at least 30 minutes. This reduces crumbs and makes the cake easier to assemble and frost.
3. Assemble Your Cake
- Start with your smaller tier if you’re making a tiered cake. Place a small amount of buttercream on a cake board and then your first cake layer. This acts as glue.
- Add a layer of buttercream, then repeat with the remaining cake layers.
4. Frost Your Cake
- Apply a crumb coat – a thin layer of frosting to catch any crumbs. Since it’s a semi naked cake, you want this layer to be minimal but even.
- Use an offset spatula and cake scraper to smooth out the frosting, leaving parts of the cake slightly exposed for the semi naked look.
5. Chill Again
- Place the assembled and frosted tiers in the fridge to set. This makes them more stable for stacking.
6. Stack the Tiers
- Prepare your base tier on a cake drum. Ensure it’s secure and level.
- Insert support straws or dowels into the base tier where the next tier will sit. This prevents the cake from sinking.
- Carefully place the next tier on top, using buttercream as glue if needed.
7. Finishing Touches
- Smooth out any imperfections where the tiers meet with additional buttercream.
- Decorate as desired. Fresh flowers are a popular choice for wedding cakes. Ensure they are clean and safe for use on cakes.
Video Tutorial
For a step-by-step visual guide on making a semi naked wedding cake, watch this helpful YouTube video.
It pairs well with this written guide, providing a visual view of the techniques discussed in a clear and easy-to-understand manner, making it complementary for both visual and text-based learners.
Baking Tips for Perfect Layers
When it comes to creating a semi naked wedding cake, the layers are the foundation. Here’s how to ensure your cake layers are perfect:
Even Baking
- Preheat your oven: Always start with a preheated oven for consistent heat.
- Quality bakeware: Use good-quality, even-heating pans to avoid hot spots that can cause uneven baking.
- Batter distribution: Divide the batter evenly between pans to ensure layers are the same thickness.
Achieving the Right Moisture Level
- Ingredients at room temperature: Ingredients like eggs and butter should be at room temperature to mix evenly.
- Don’t overbake: Keep an eye on the baking time. Overbaking can dry out your cake.
Leveling and Stacking
- Cooling: Let the layers cool completely before leveling to prevent crumbling.
- Leveling: Use a serrated knife or a cake leveler to trim off any domes for flat layers.
Frosting Techniques for the Semi Naked Look
The semi naked look is all about the delicate balance of frosting. Here’s how to achieve it:
Preparing Your Buttercream
- Consistency is key: The buttercream should be thin enough to spread easily but thick enough to hold its shape.
Applying the Frosting
- Crumb coat: Start with a thin crumb coat to lock in any loose crumbs.
- Final layer: Apply a final layer of frosting, scraping back to reveal parts of the cake beneath.
Smoothing for the Perfect Finish
- Gentle touches: Use a bench scraper for smooth sides, applying gentle pressure to avoid tearing the cake.
- Top edges: Smooth the top edges with an offset spatula for a clean finish.
By following these tips, you’ll make a stunning semi naked wedding cake that is both delicious and beautiful. Practice before the big day.
Decorating with Flowers
Decorating your semi naked wedding cake with flowers adds a touch of natural beauty and elegance. Here’s how to do it right:
Choosing the Right Flowers
- Edible Flowers: Opt for edible flowers like pansies, violas, or roses, ensuring they are pesticide-free.
- Non-Edible Blooms: If using non-edible flowers, ensure they are clean and place them in a way that they can be easily removed before serving.
Preparing the Flowers
- Wash and Dry: Gently wash the flowers in cold water and let them air dry.
- Trim Stems: Cut the stems to the desired length, leaving enough to insert into the cake.
Arranging the Flowers
- Plan Your Design: Before you start, visualize where you want each flower to go.
- Insertion: Use floral tape to wrap the stems and insert them into the cake at an angle to prevent them from wilting.
Preservation and Transportation
Ensuring your cake looks perfect at the venue requires proper preservation and transportation:
Preservation
- Refrigeration: Keep the cake refrigerated until it’s time to transport.
- Humidity Control: If the weather is humid, consider using a dehumidifier to prevent the cake from becoming sticky.
Transportation
- Stable Base: Place the cake on a flat, stable surface in the vehicle.
- Cool Environment: Keep the car cool with air conditioning to prevent melting.
- Drive Carefully: Take corners and brakes slowly to avoid shifting the cake.
Serving Suggestions for a Semi Naked Wedding Cake
When presenting a semi naked wedding cake, the goal is to enhance its natural beauty and complement the wedding theme. Here are some serving suggestions:
Creative Display Ideas
- Cake Stand: Elevate your cake on a stand that matches your wedding decor for a stunning display.
- Natural Elements: Incorporate elements like wood slices or marble slabs for a rustic or elegant look.
- Lighting: Use soft lighting around the cake table to highlight the cake and make it a focal point.
Cutting the Cake
- Ceremonial First Slice: Have the couple perform the first cut together, symbolizing their union.
- Guided Cutting: If the cake has multiple tiers, start cutting from the bottom tier for stability.
- Serving Size: Consider the number of guests and cut slices accordingly to ensure everyone gets a piece.

FAQs and Troubleshooting
Making a semi naked wedding cake can come with its own set of challenges. Here are some FAQs and troubleshooting tips:
Common Questions
- How do I prevent the cake from drying out? Keep the cake refrigerated until a few hours before serving and use a buttercream with a high fat content to lock in moisture.
- Can I use real flowers? Yes, but ensure they are food-safe and pesticide-free. Consider using a floral barrier between the cake and the flowers.
- How far in advance can I bake the cake? It’s best to bake the cake either the morning of the wedding or the day before to ensure freshness. The semi naked style helps prevent the sponge from drying out.
- What’s the best way to apply buttercream for a semi naked look? Use a thin consistency buttercream and apply a light layer. It’s easier to add more than to take away.
- Can I use ganache instead of buttercream? Yes, ganache can be used for a richer taste, but ensure it’s the right consistency to avoid damaging the cake layers.
Troubleshooting Tips
- Crumbly Cake: If the cake is too crumbly, it may be overbaked. Next time, reduce the baking time and check for doneness earlier.
- Melting Frosting: If the frosting starts to melt, place the cake back in a cool environment immediately. Use a buttercream that holds up well in warm conditions for outdoor weddings.
- Buttercream Consistency: If your buttercream is too stiff, it may pull crumbs from the cake. Soften it with a little milk or cream.
- Cake Crumbling: If the cake layers crumble during frosting, they might be too warm. Chill the layers before assembly to make them firmer and easier to work with.
- Streaky Frosting: If using a hot scraper to smooth the frosting, be careful not to melt the fat in the buttercream, which can cause streaks. Dip the scraper in hot water, then dry it before using.
Wrapping Up
By following these steps, you’ll create a stunning semi naked cake that’s sure to be the centerpiece of any celebration. Remember to take your time, and don’t worry about small imperfections – the beauty of semi naked cakes lies in their rustic charm. Enjoy the process and the delicious outcome of your efforts!
